Overview
When a customer buys a pre-order or deposit item powered by K1 PreOrder, Shopify automatically adds extra text and dates to several places — the checkout, order status page, customer account, and email notifications. This text usually looks like “Due on Jan 15, 2026” or “Due on fulfillment”.
Most of this text is controlled by Shopify's Theme Content, not by K1 PreOrder. That means you can edit, rephrase, or hide it directly from your store admin to better match your brand and your pre-order policy.
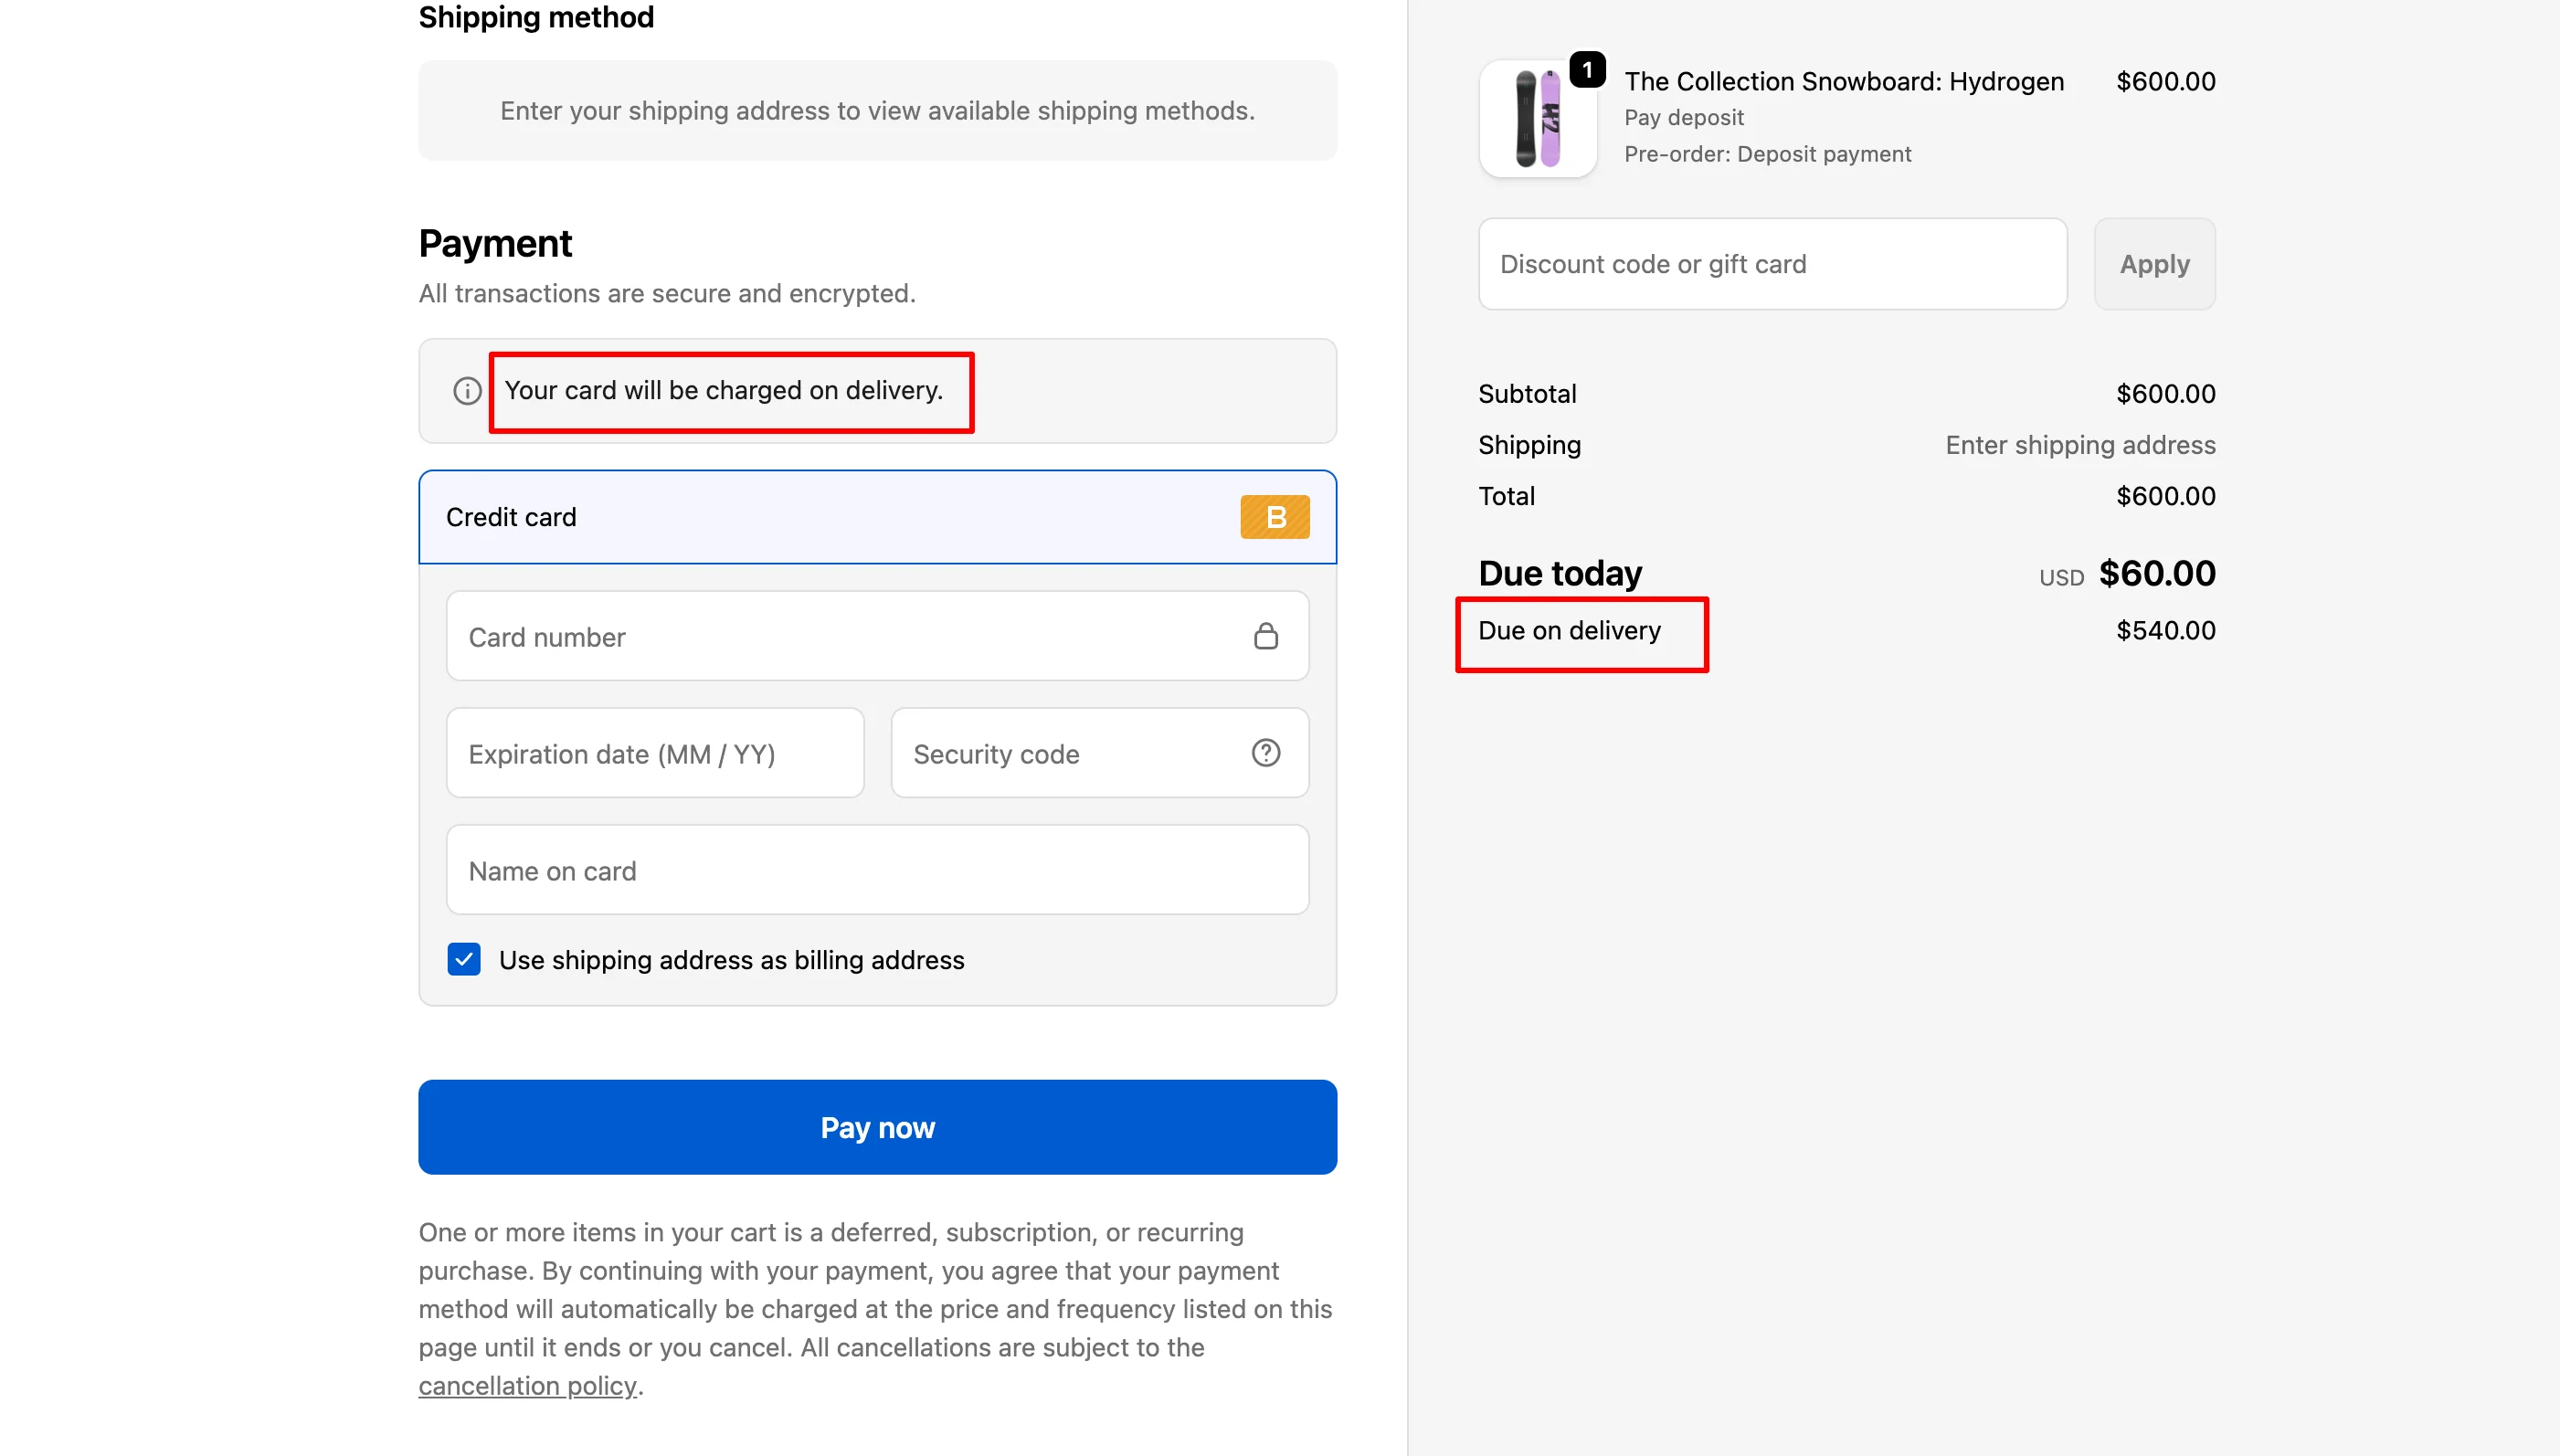
Where This Text Appears
The due date and deposit-related text can show up in any of these places:
- Checkout — order summary and payment section
- Order status page — order summary after checkout
- New customer accounts — order list and order details page
- Email notifications — order confirmation and order invoice
You can edit each of these independently. The next sections explain how.
Open Theme Content
The next three parts all use the same place in Shopify admin: Theme Content. Open it once and reuse it for every edit below.
- In your Shopify admin, go to Online Store → Themes.
- On your live theme, click the ⋯ menu and choose Edit default theme content.
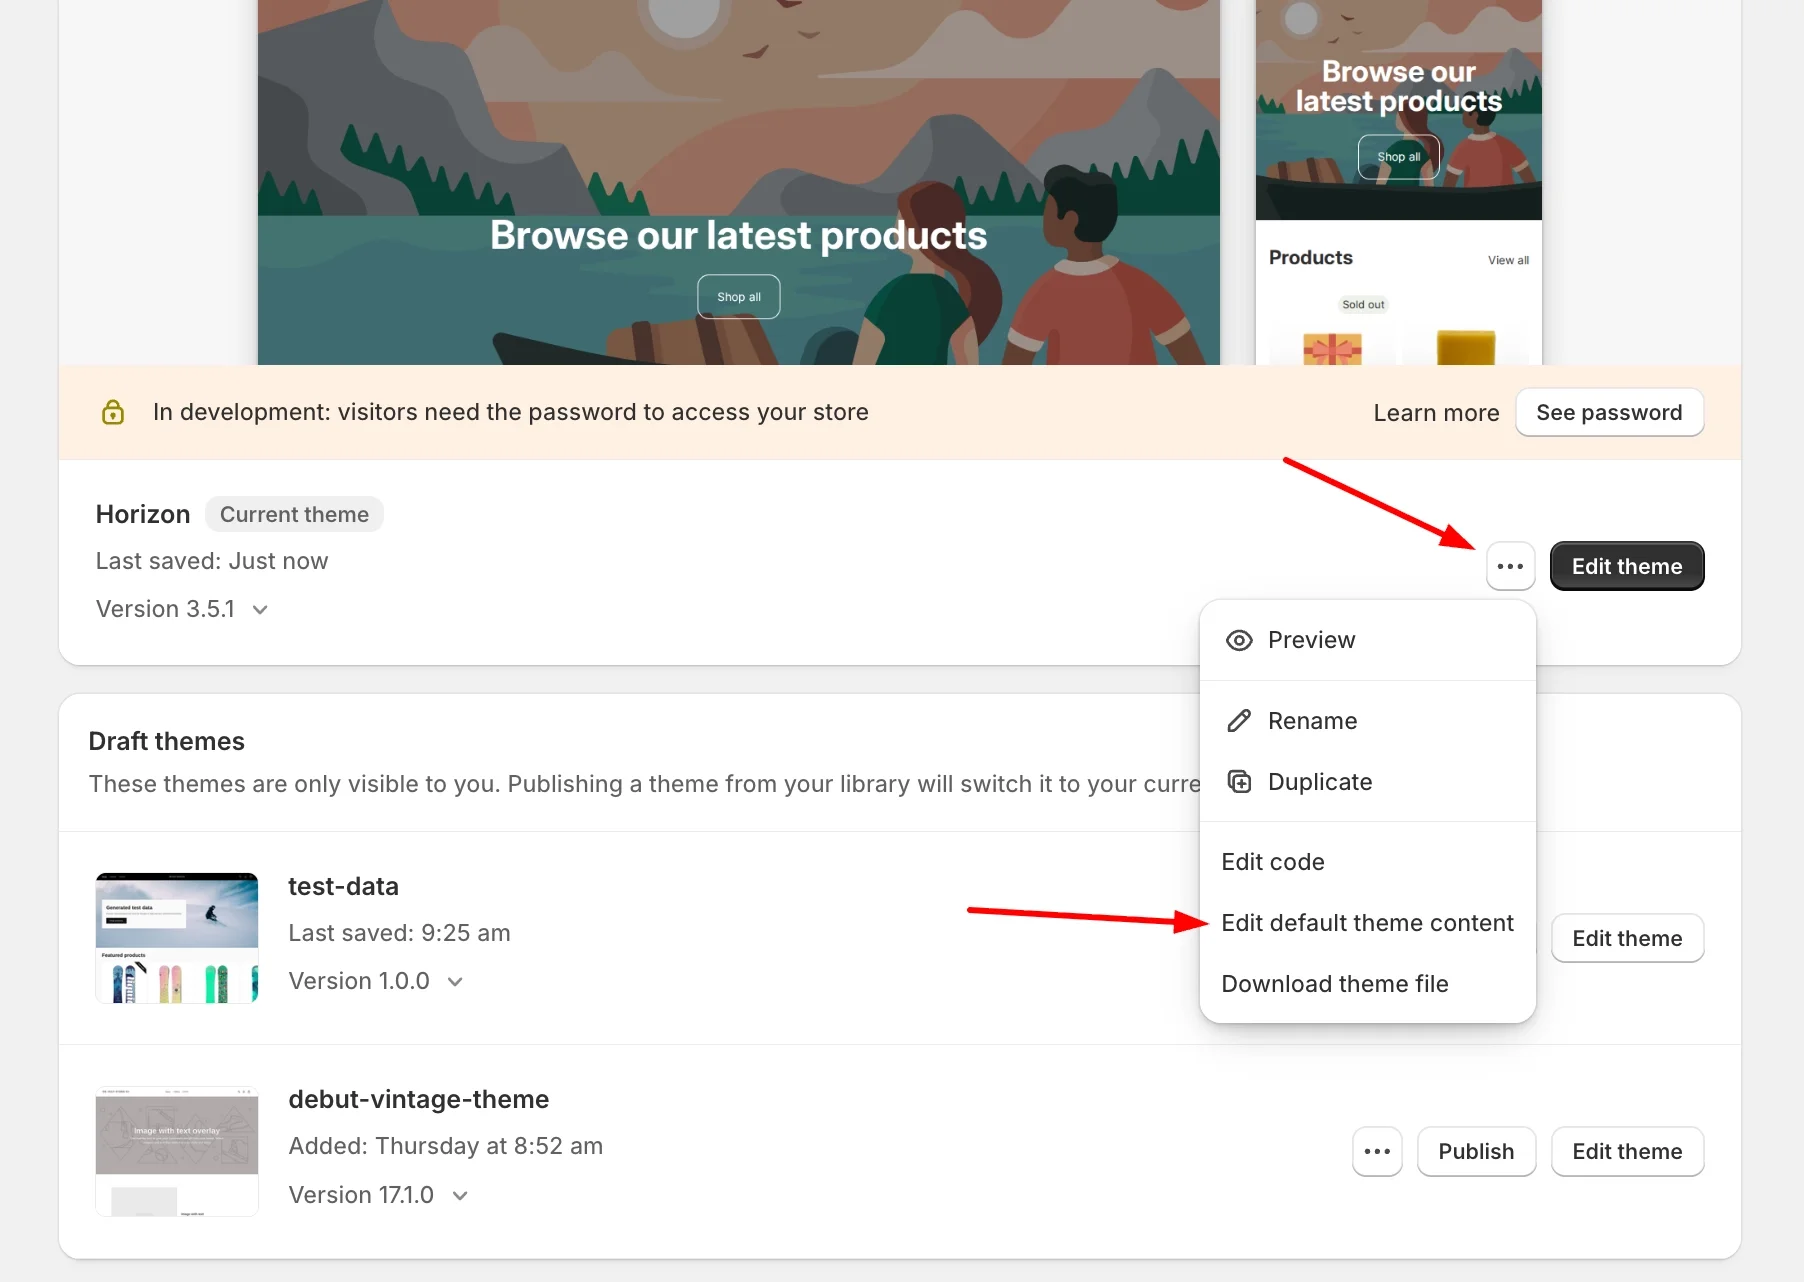
Part 1. Edit Text on the Checkout
The checkout shows the due date in two areas: the order summary (next to the total) and the payment section (under the payment form).
Step 1. Find the Fields
In the Theme content search bar, type the keyword from the table below and locate the matching field(s).
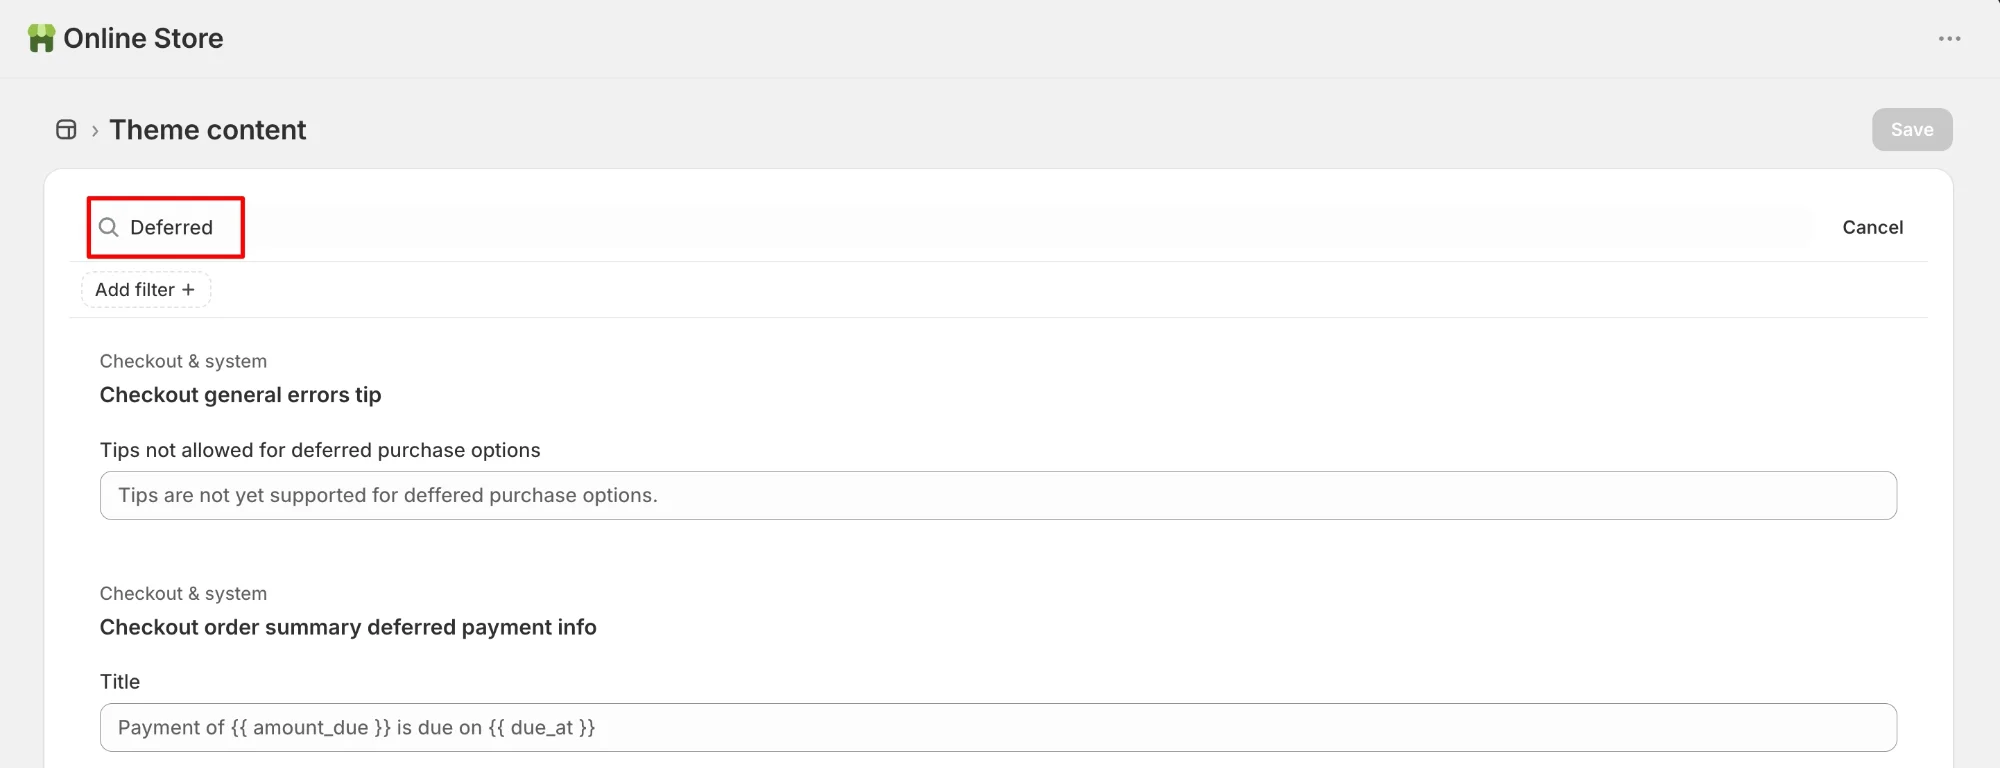
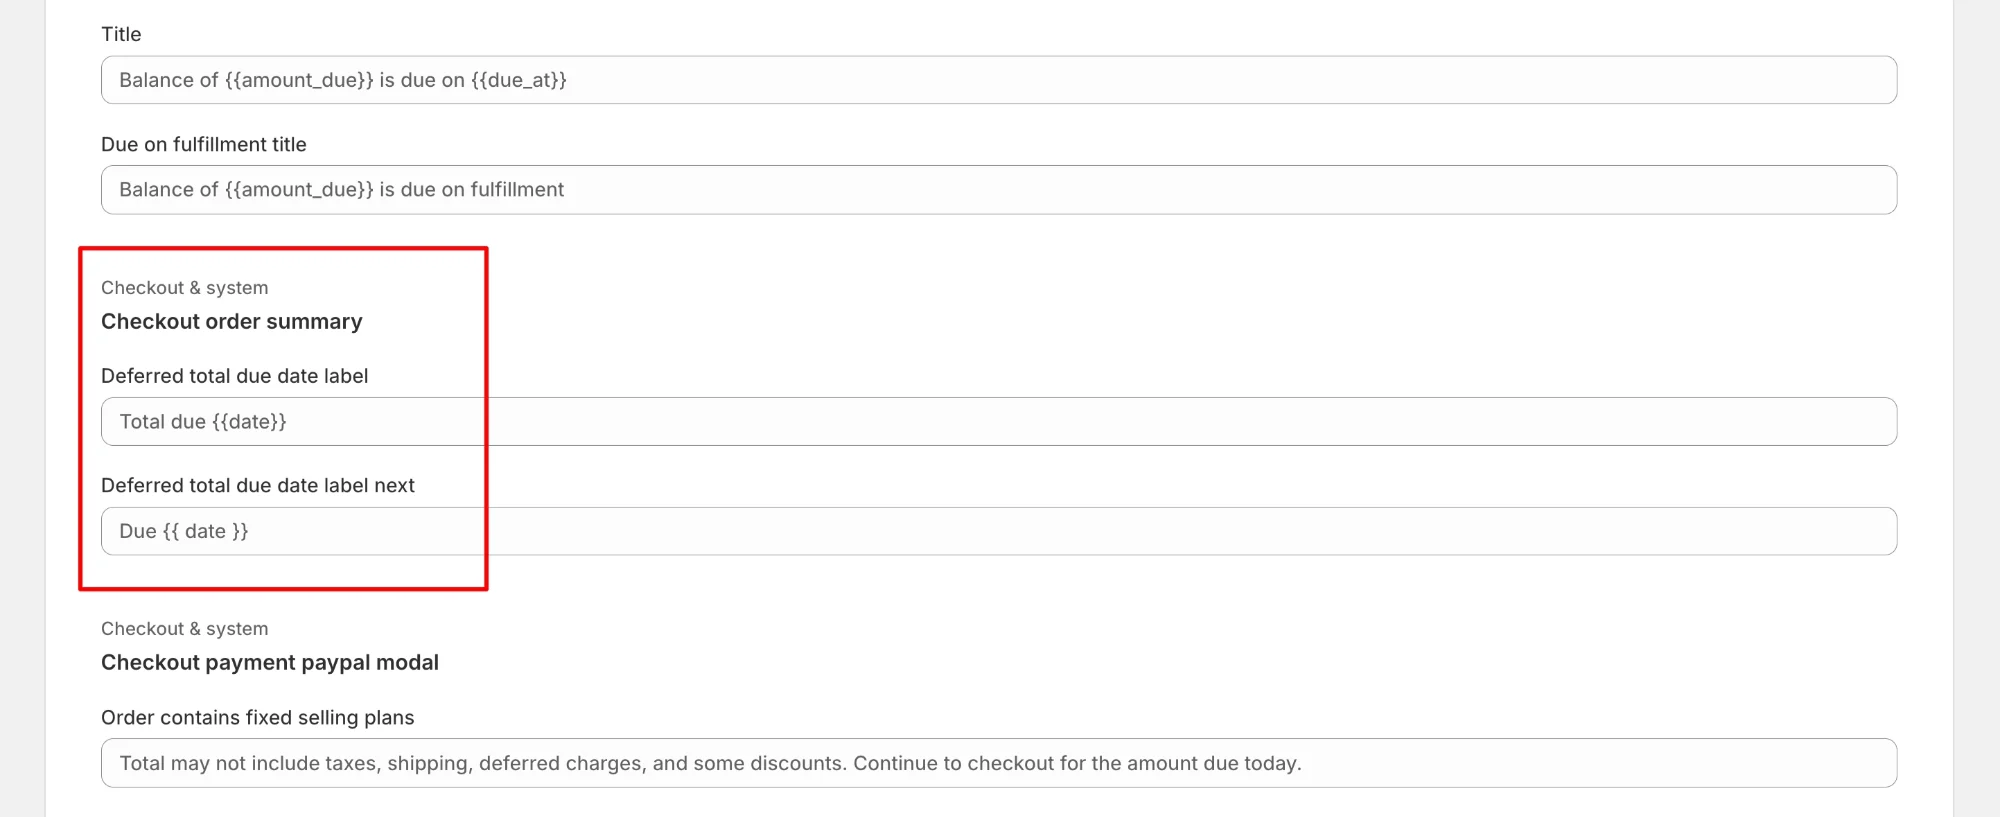
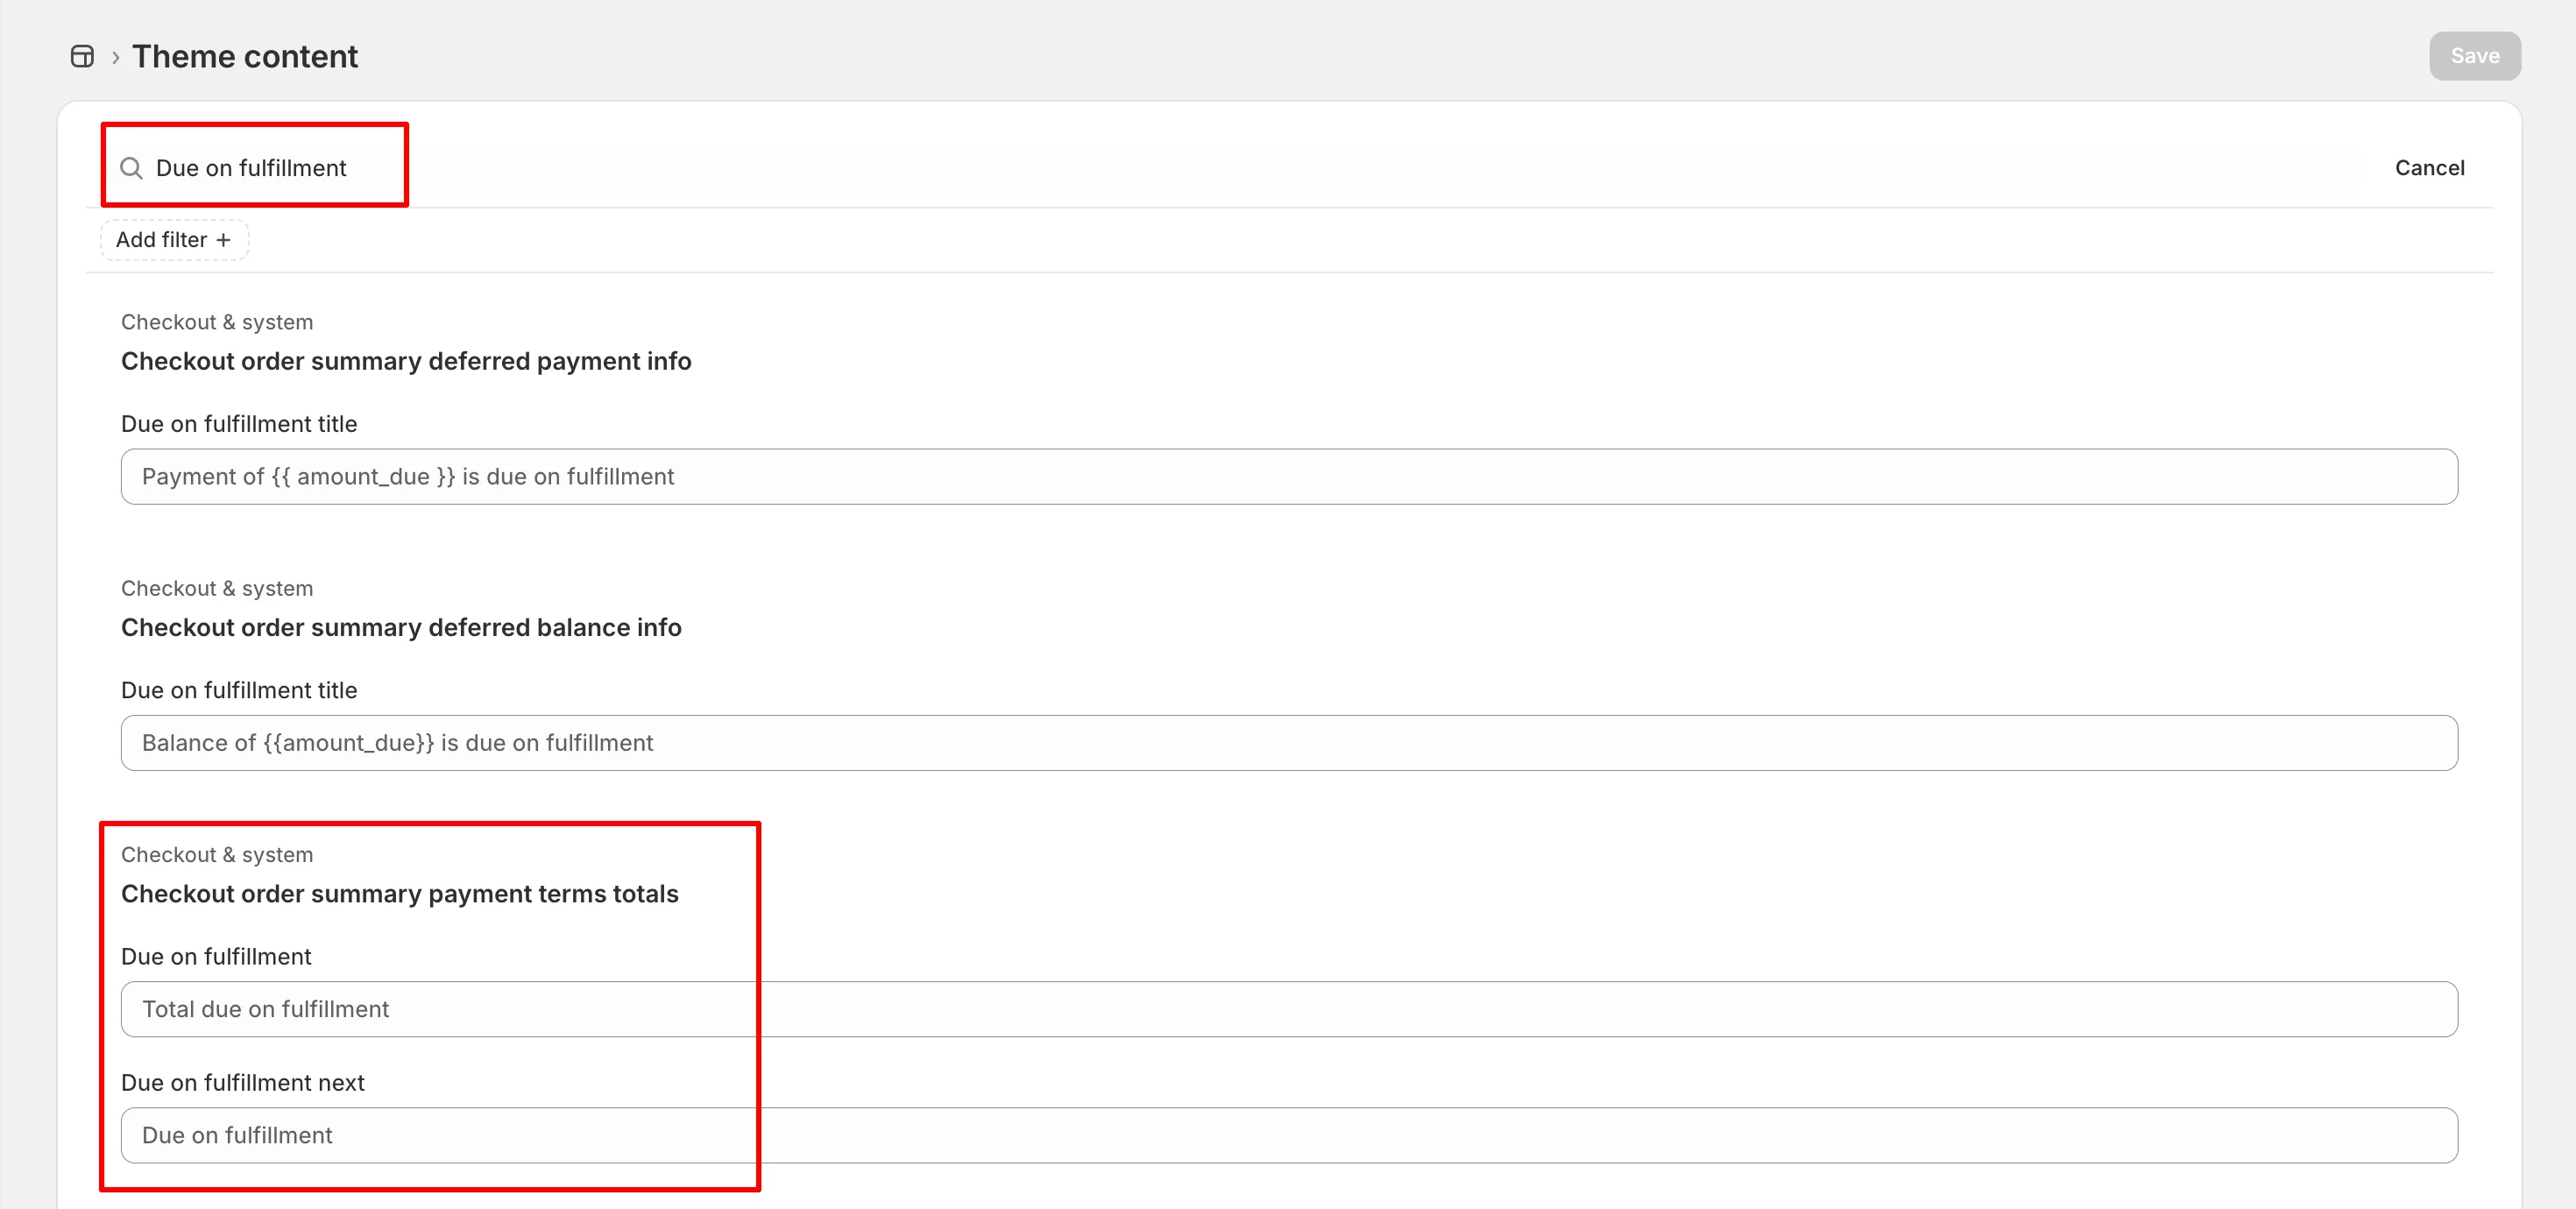
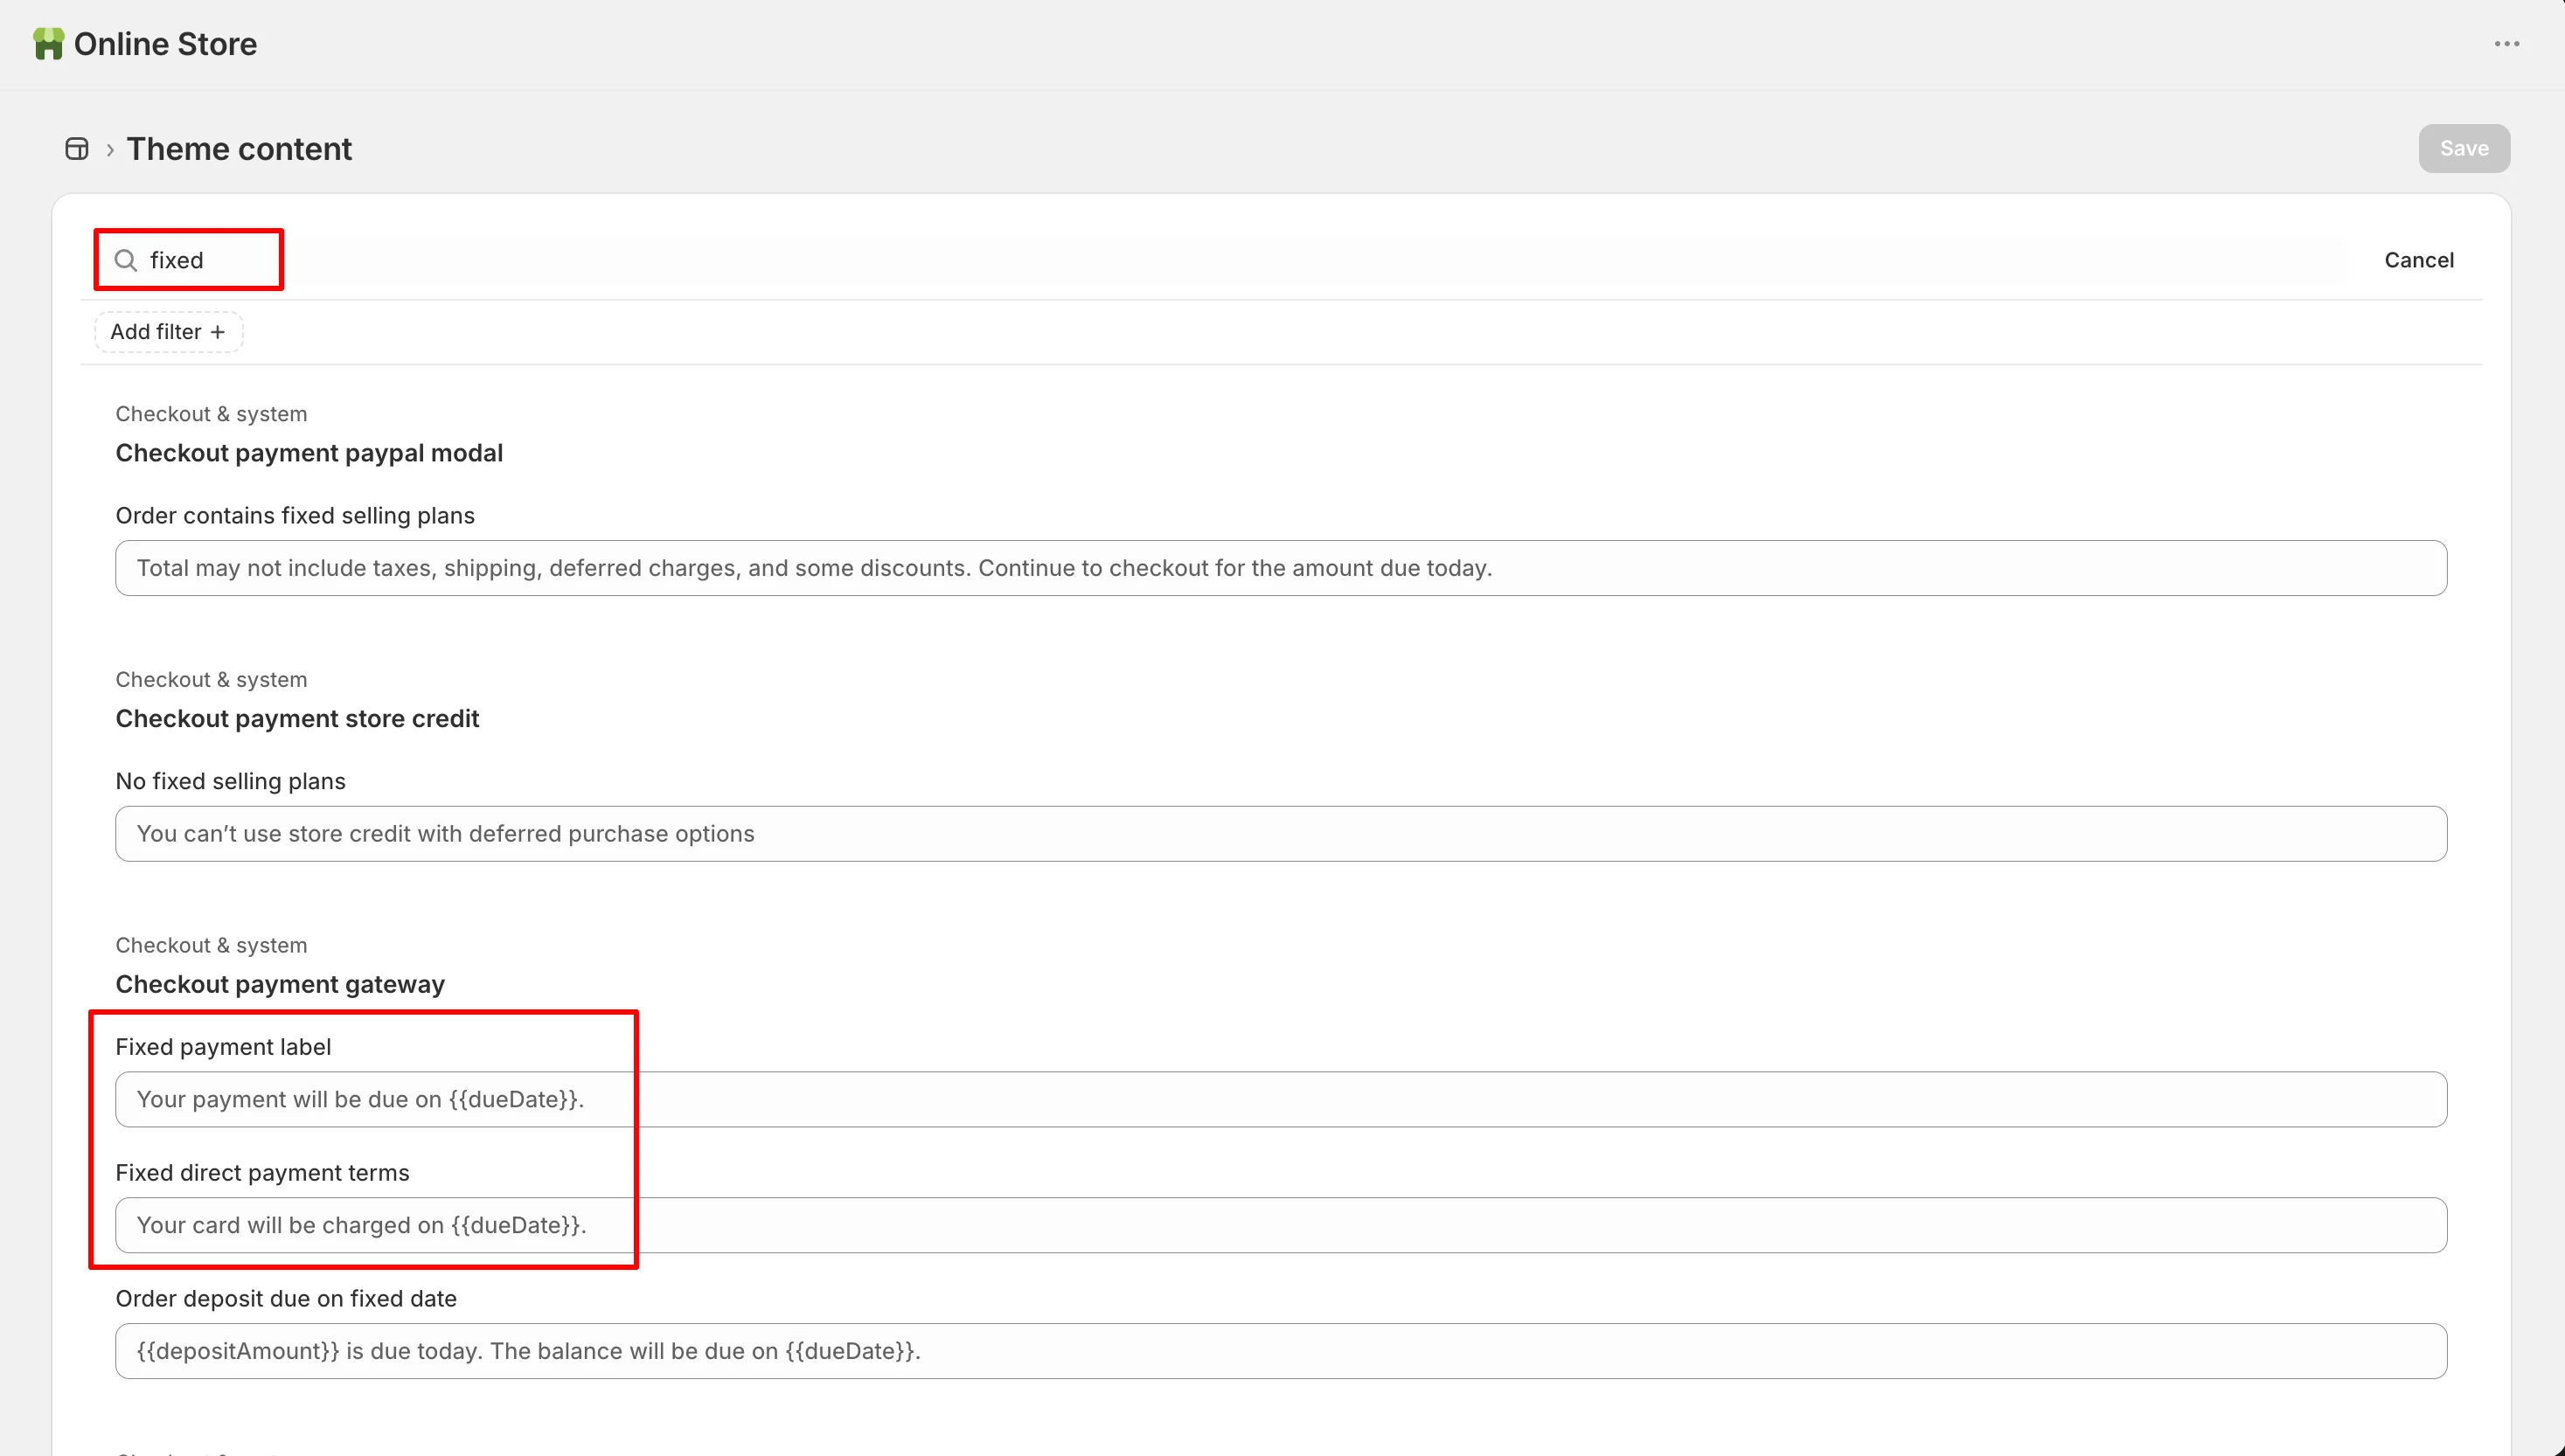
Step 2. Edit the Text
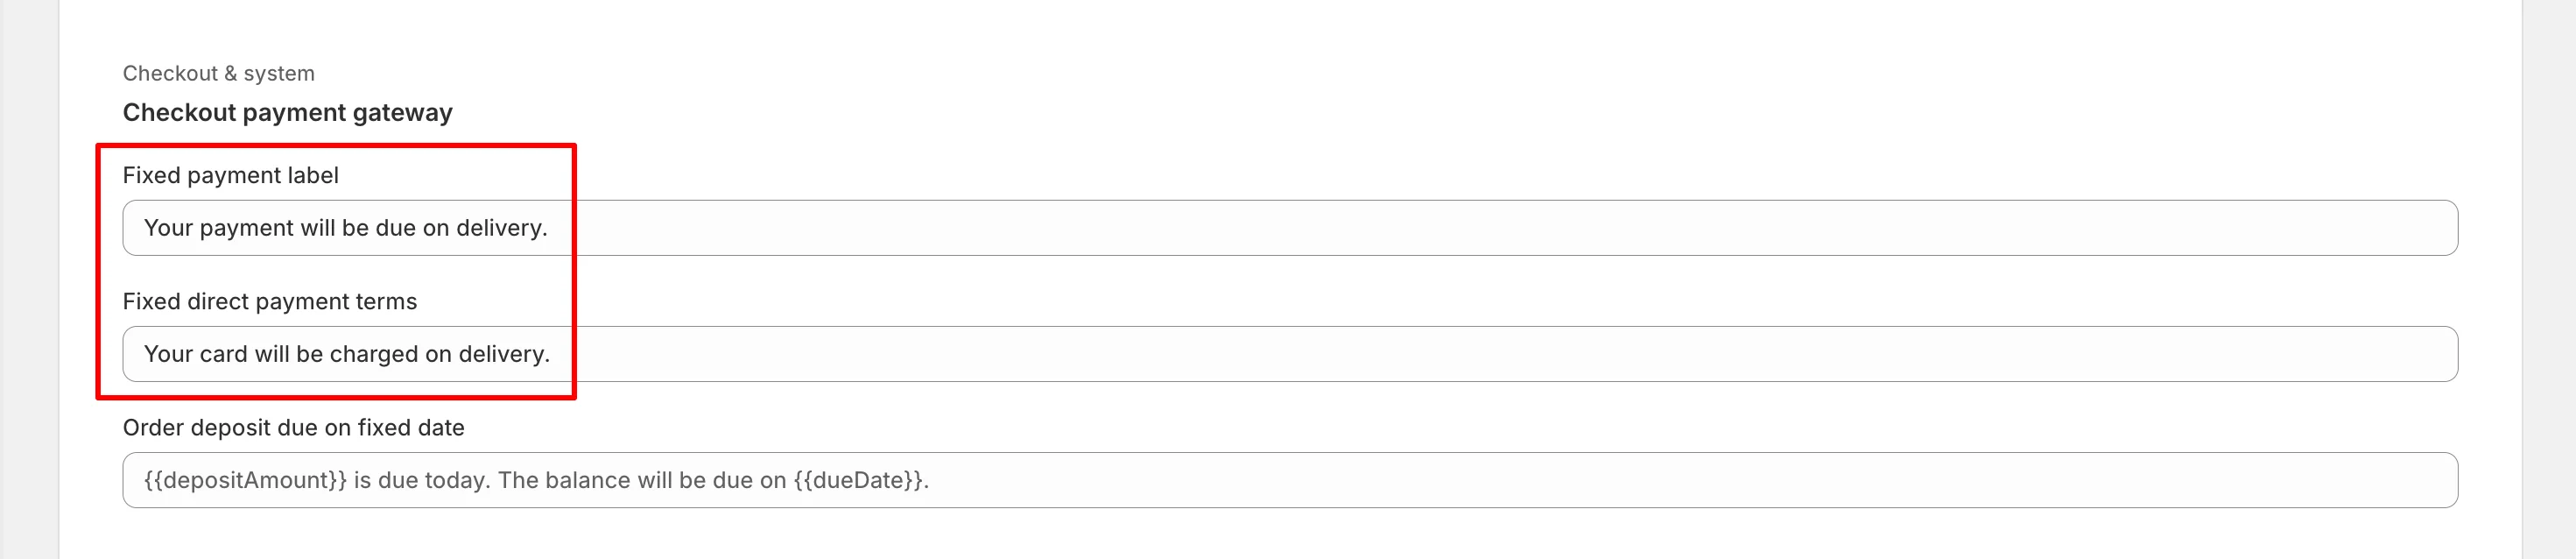
- Click into each field and replace the wording with your own text.
- If a duplicate “… next” version exists, paste the same text into it.
- Click Save in the top-right corner.
Examples of replacement text:
- Due at shipping
- Due on fulfillment
- Due at pickup
- Due on delivery
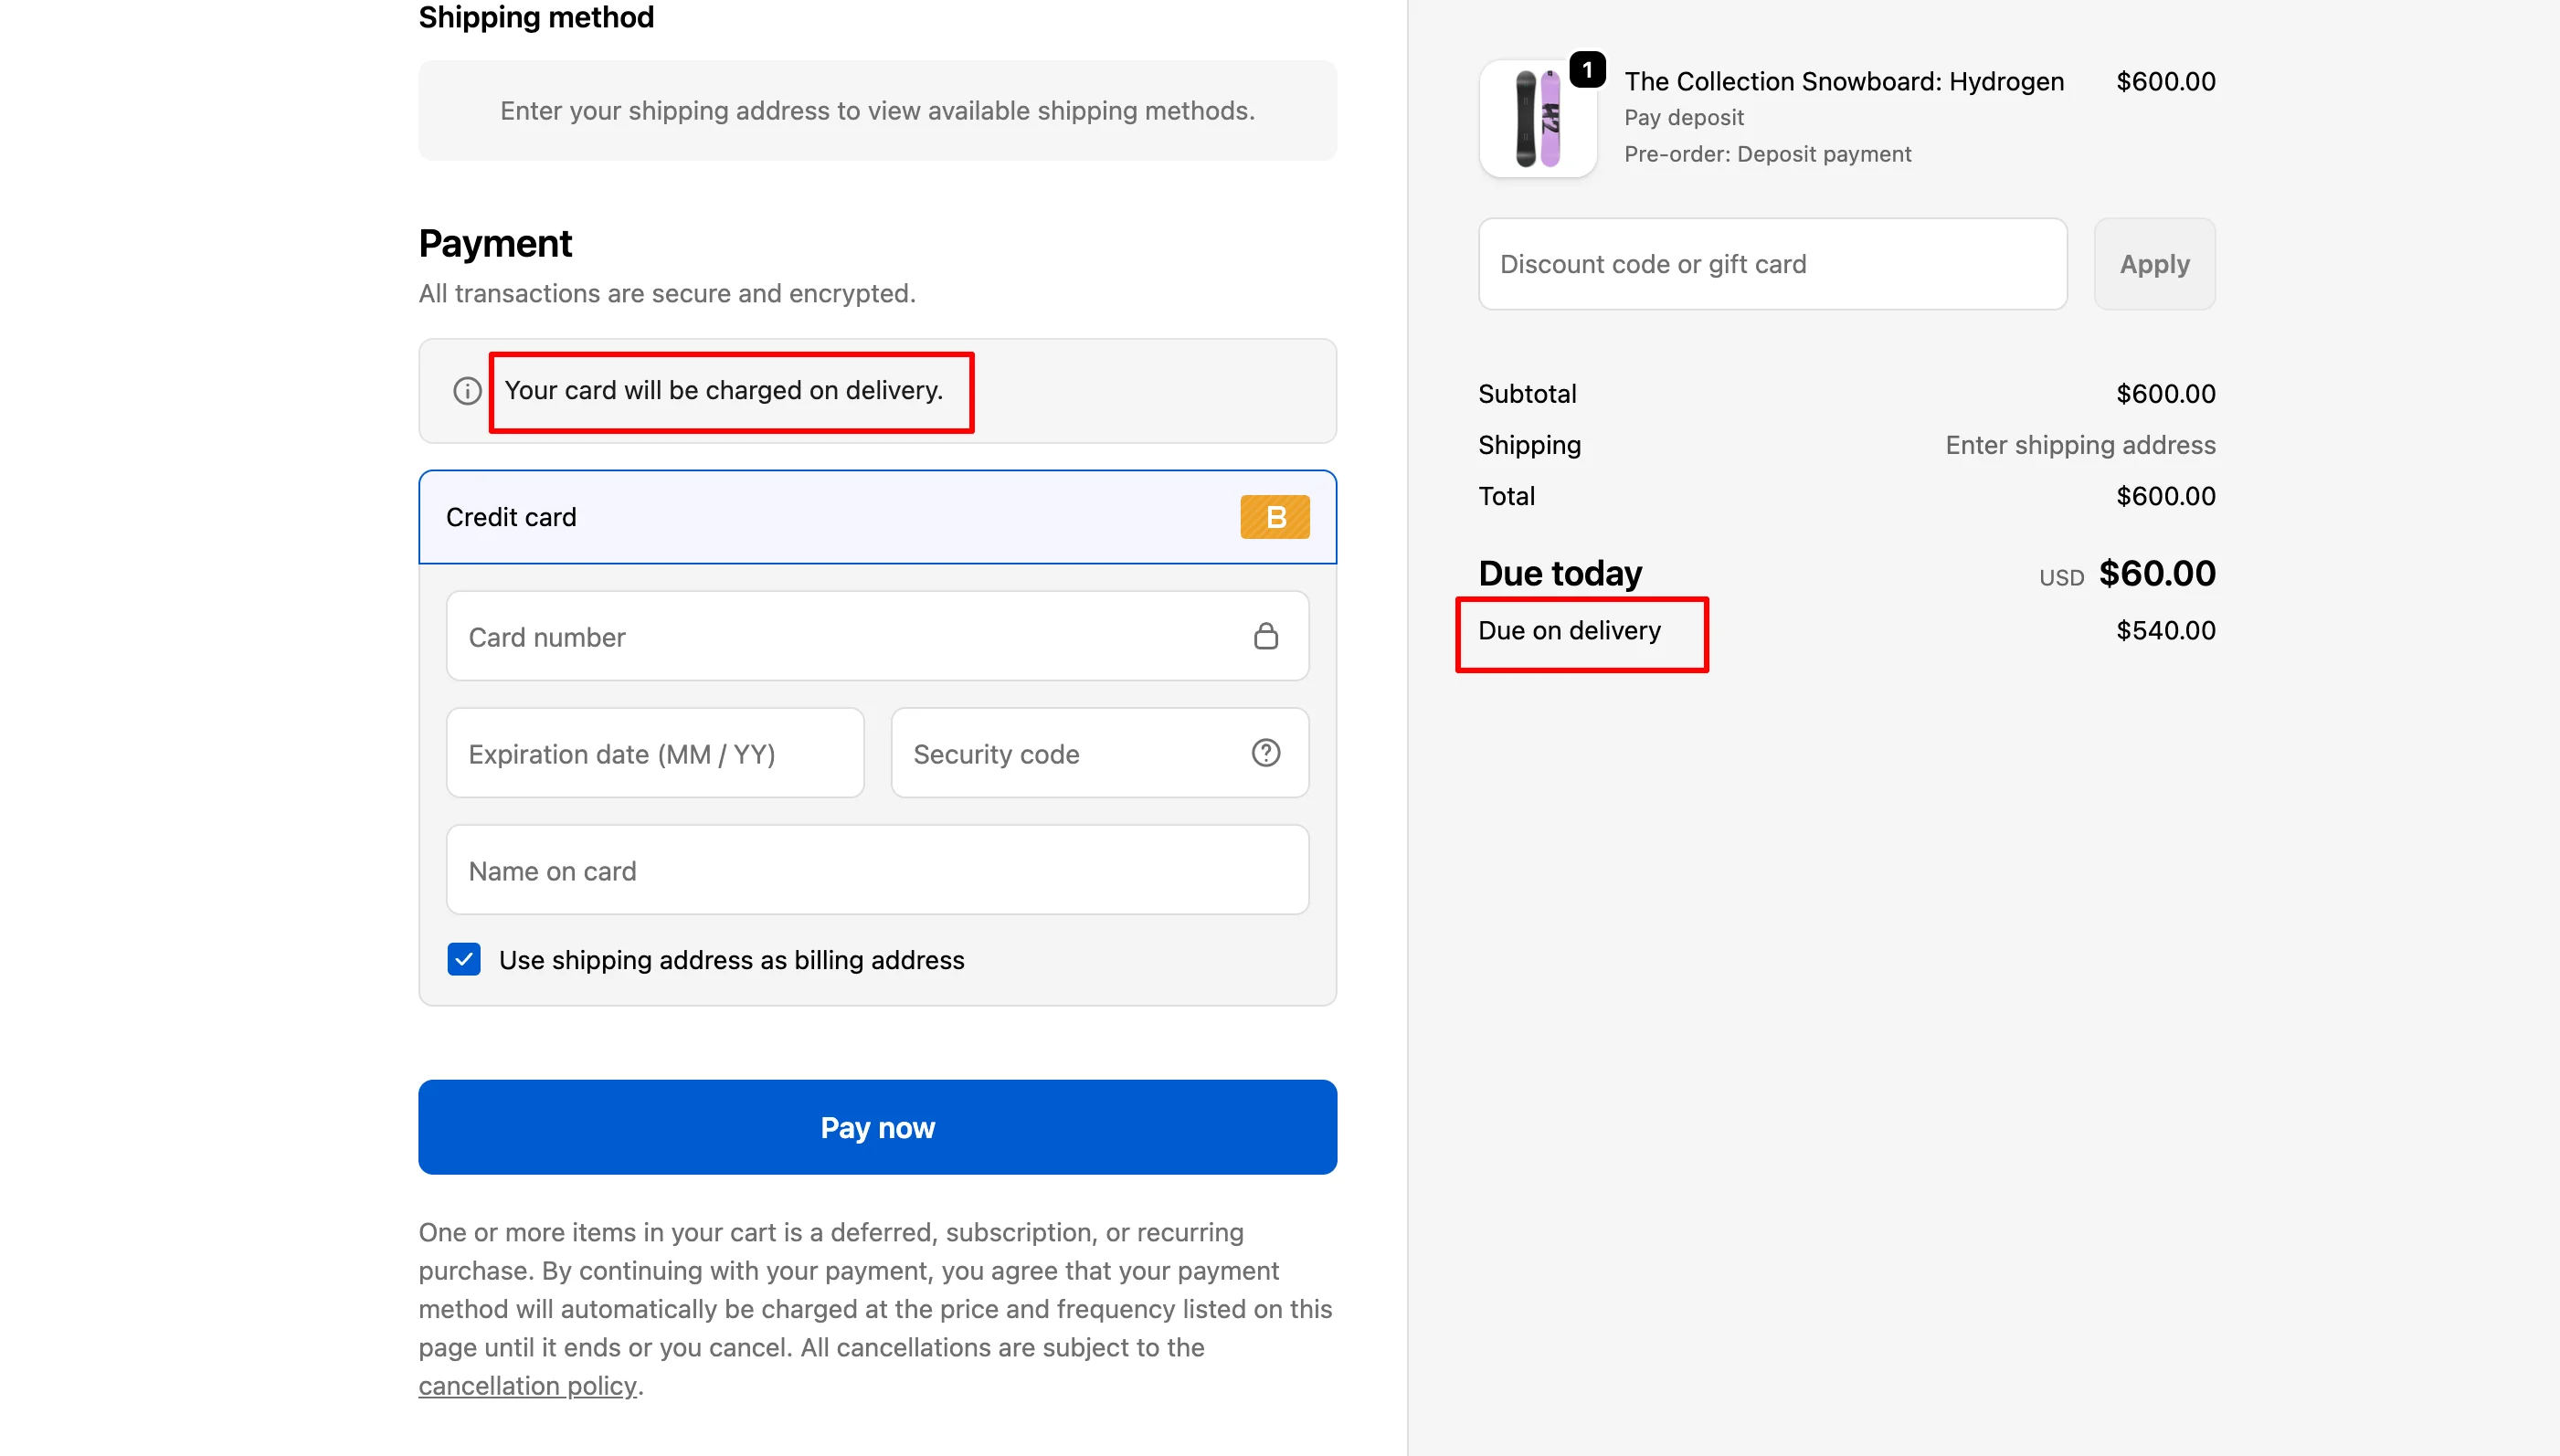
Step 3. Verify on the Storefront
- Open your storefront in an incognito window.
- Add a pre-order/deposit product to the cart and go through checkout.
- Confirm the new text appears in both the order summary and payment section.
Part 2. Edit Text in Customer Accounts
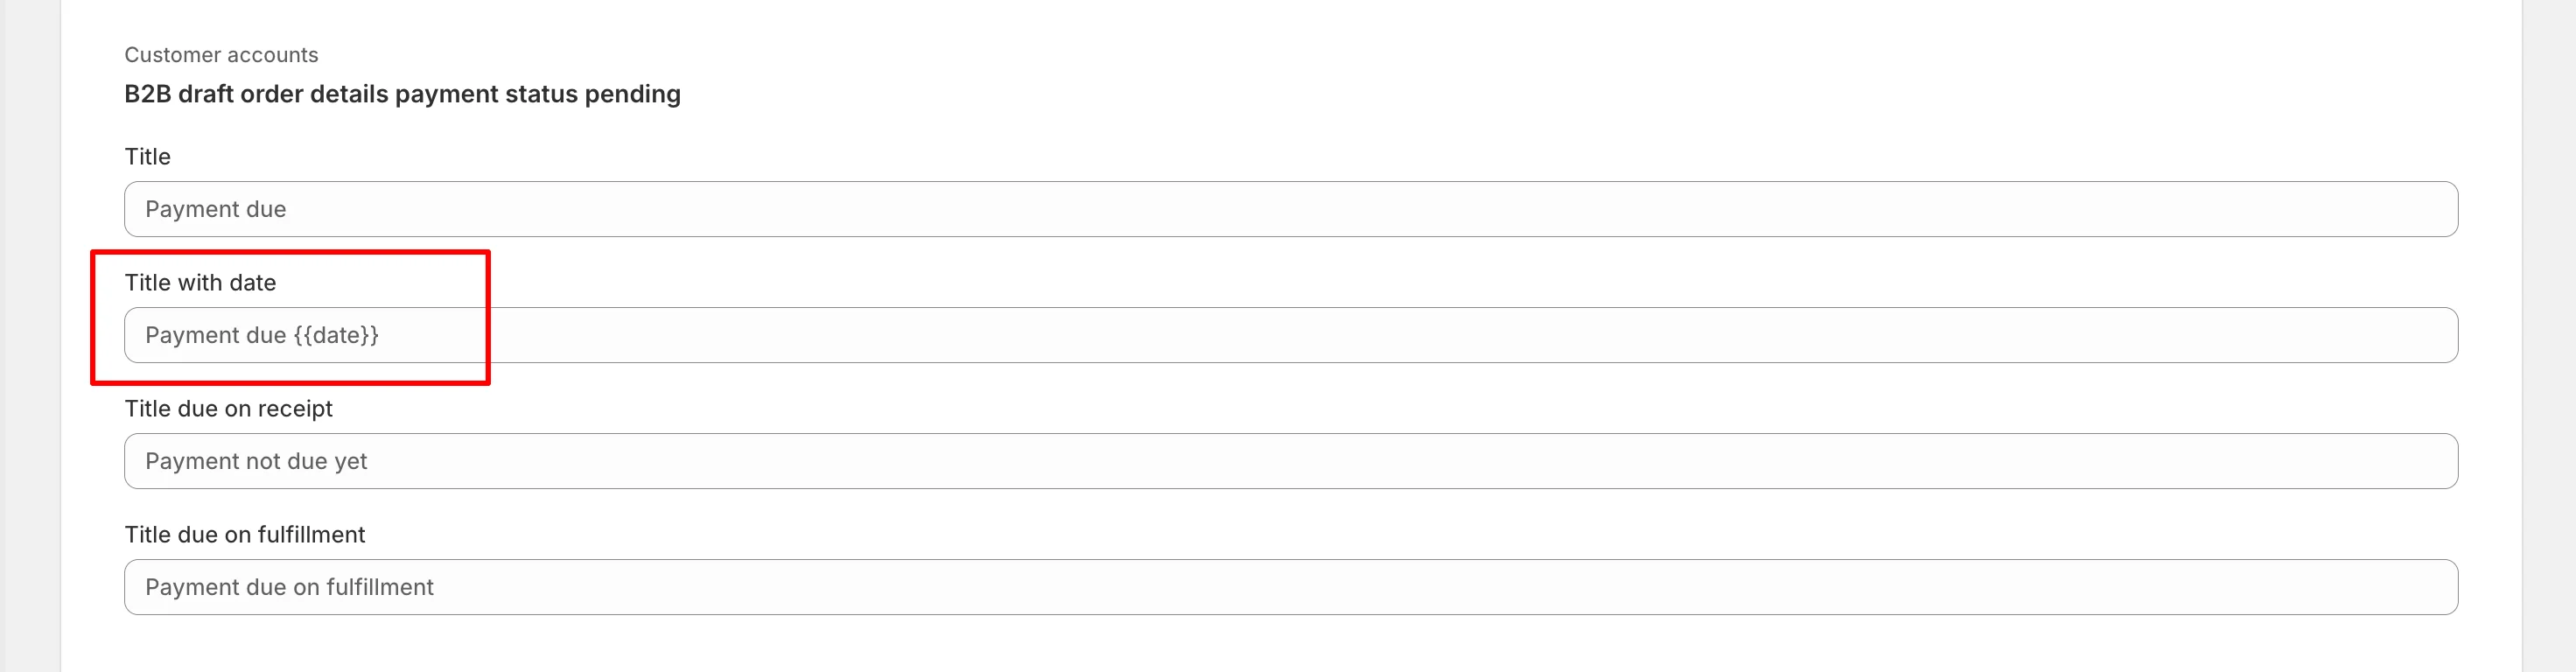
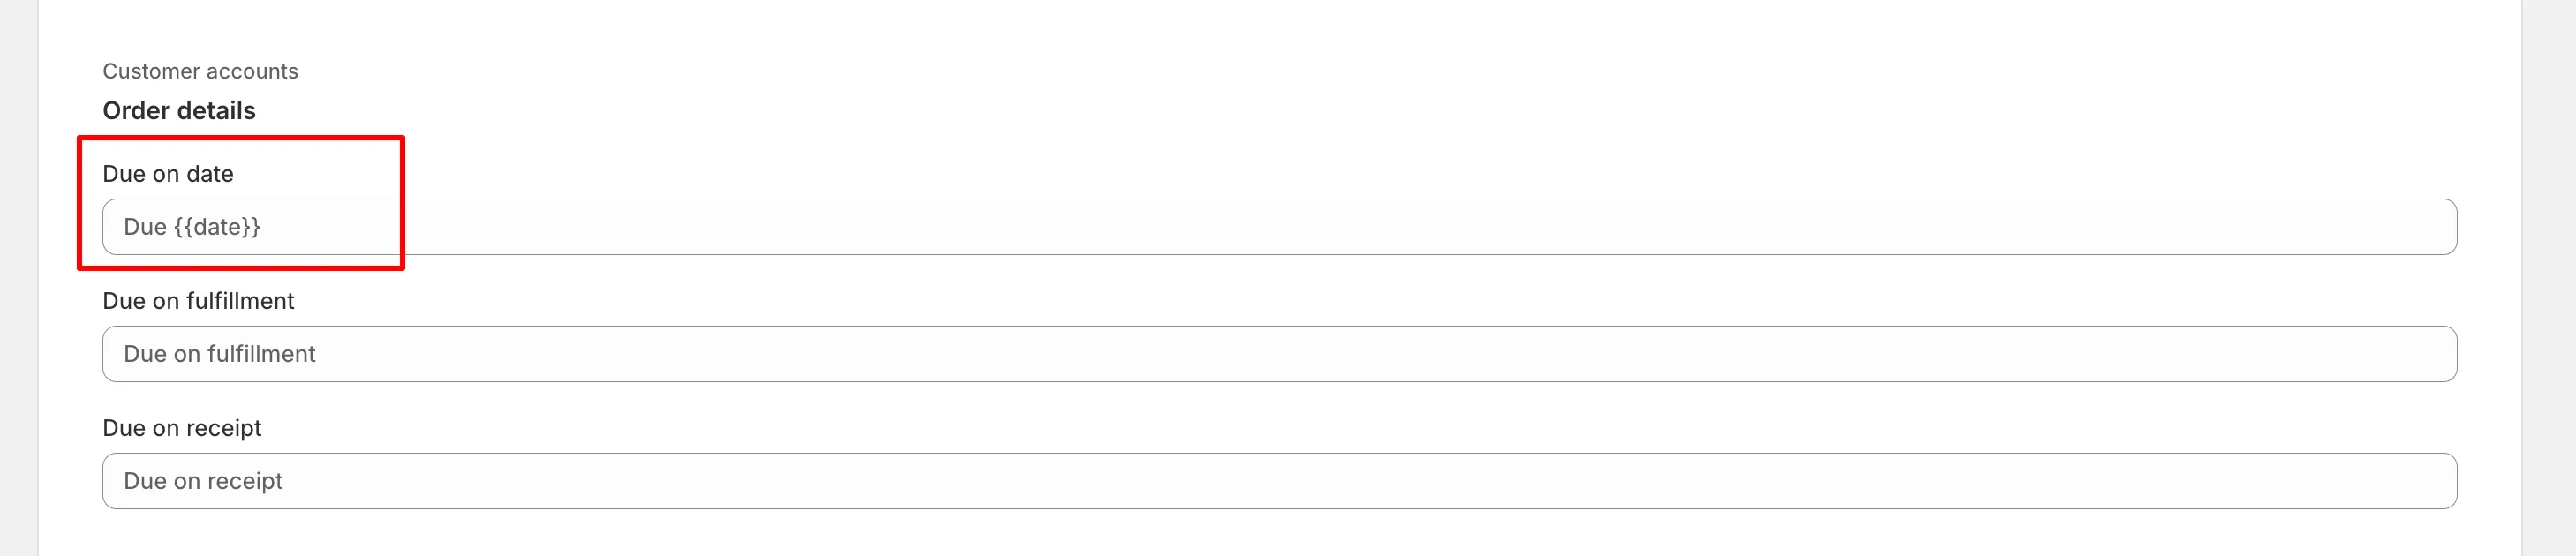
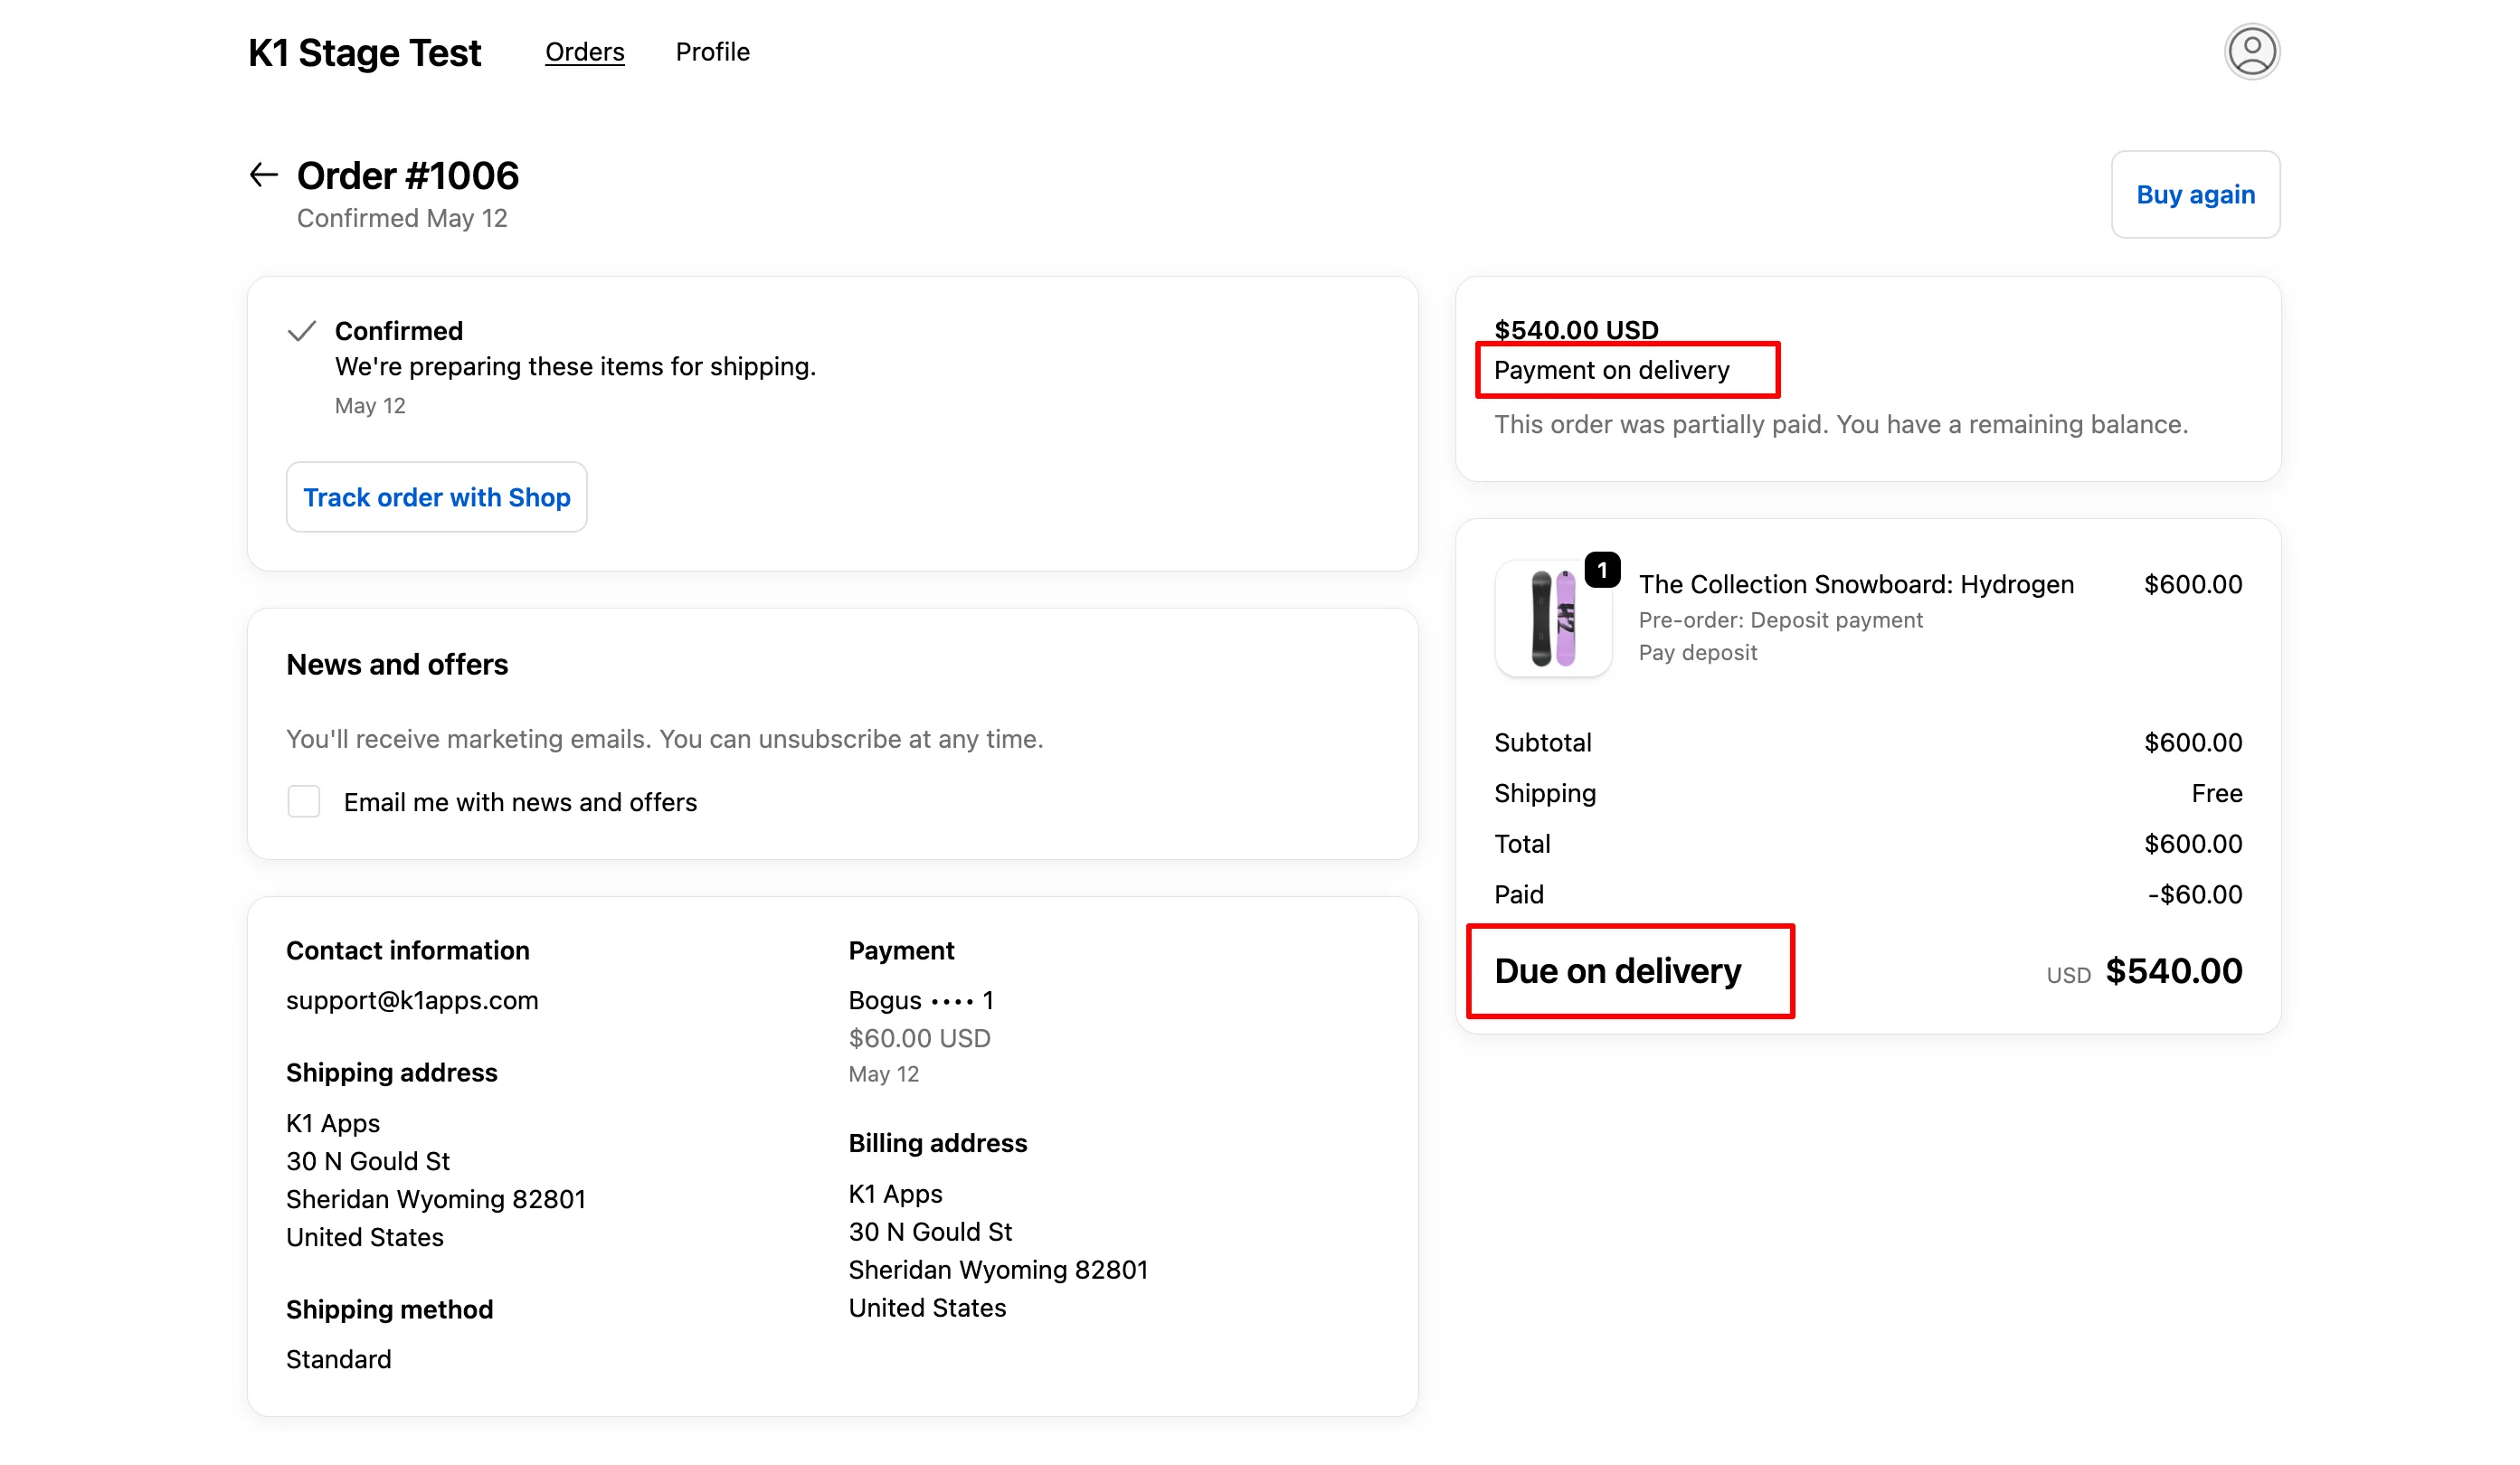
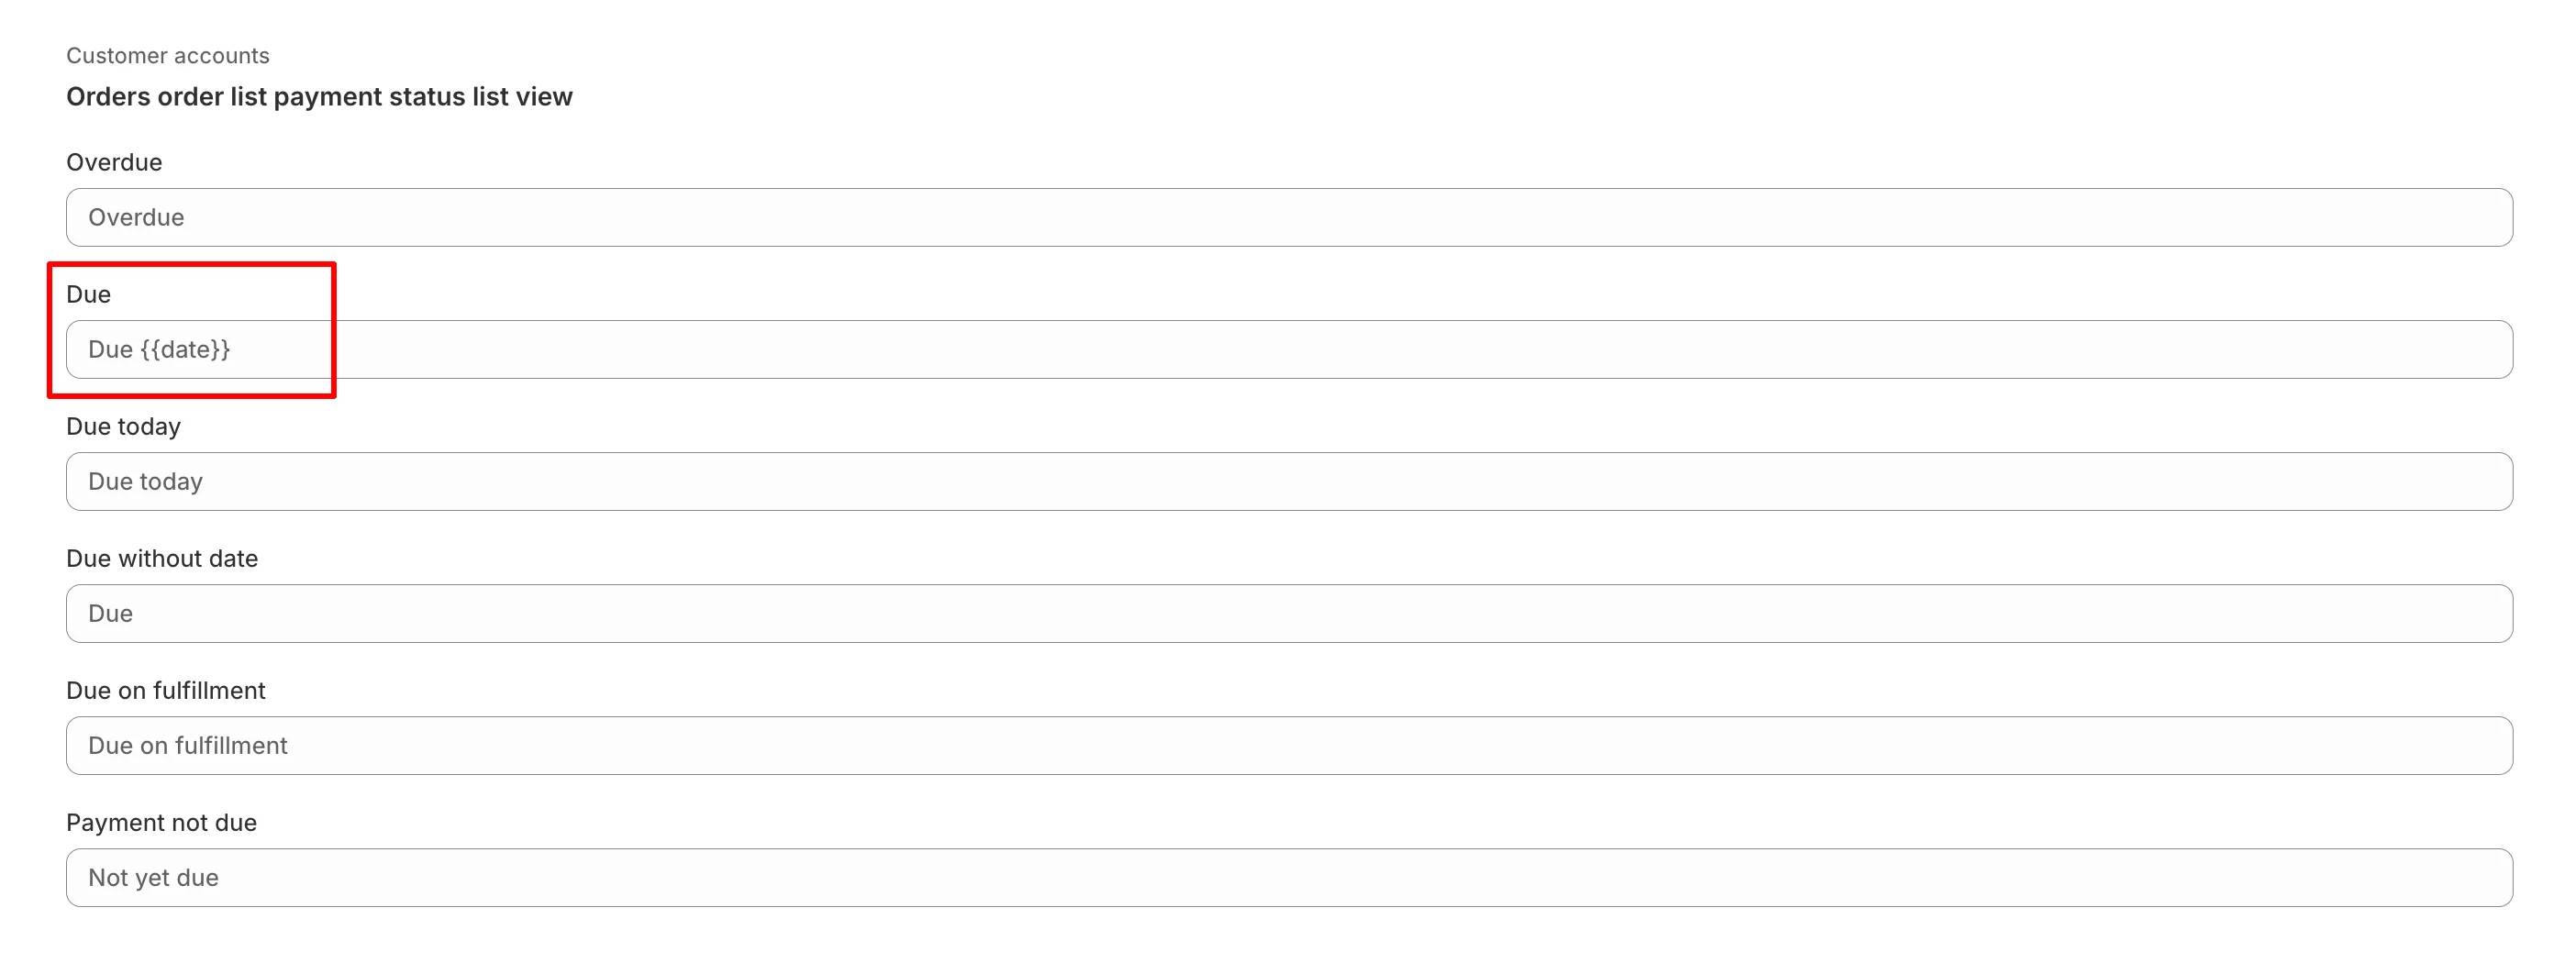
This applies only to new customer accounts (not the legacy accounts). The due date appears in two places: the order list and the order details page.
Step 1. Find the Fields
In the Theme content search bar, type the keyword from the table below.
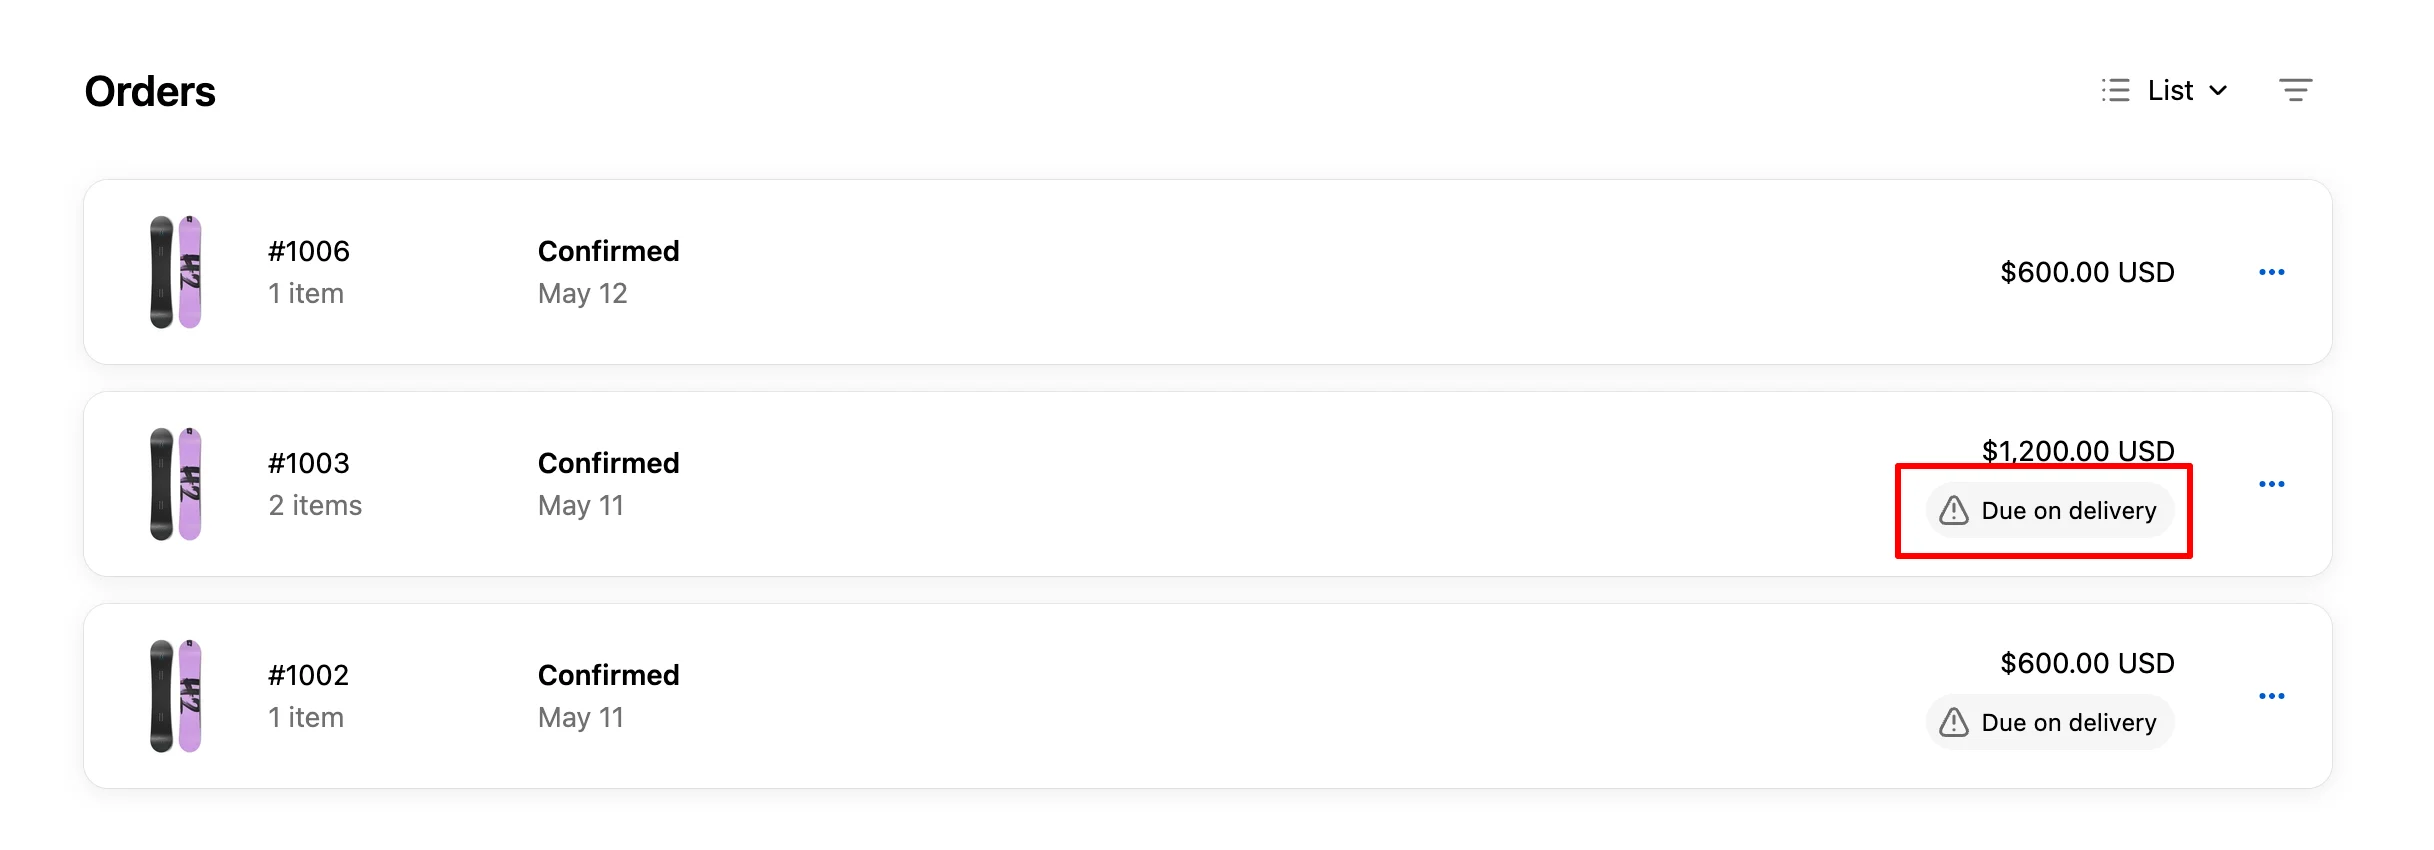
Step 2. Edit the Text
- Click into each field and type your new wording.
- Click Save in the top-right corner.
Step 3. Verify on the Storefront
- Log into a test customer account that has a pre-order with a deposit.
- Open the Orders list and the order details page.
- Confirm the new text appears in all locations.
Part 3. Edit Text in Email Notifications
The order confirmation and order invoice emails also include the due date and deposit information. These are edited in a different place — Shopify's email templates (HTML).
Step 1. Open the Email Template
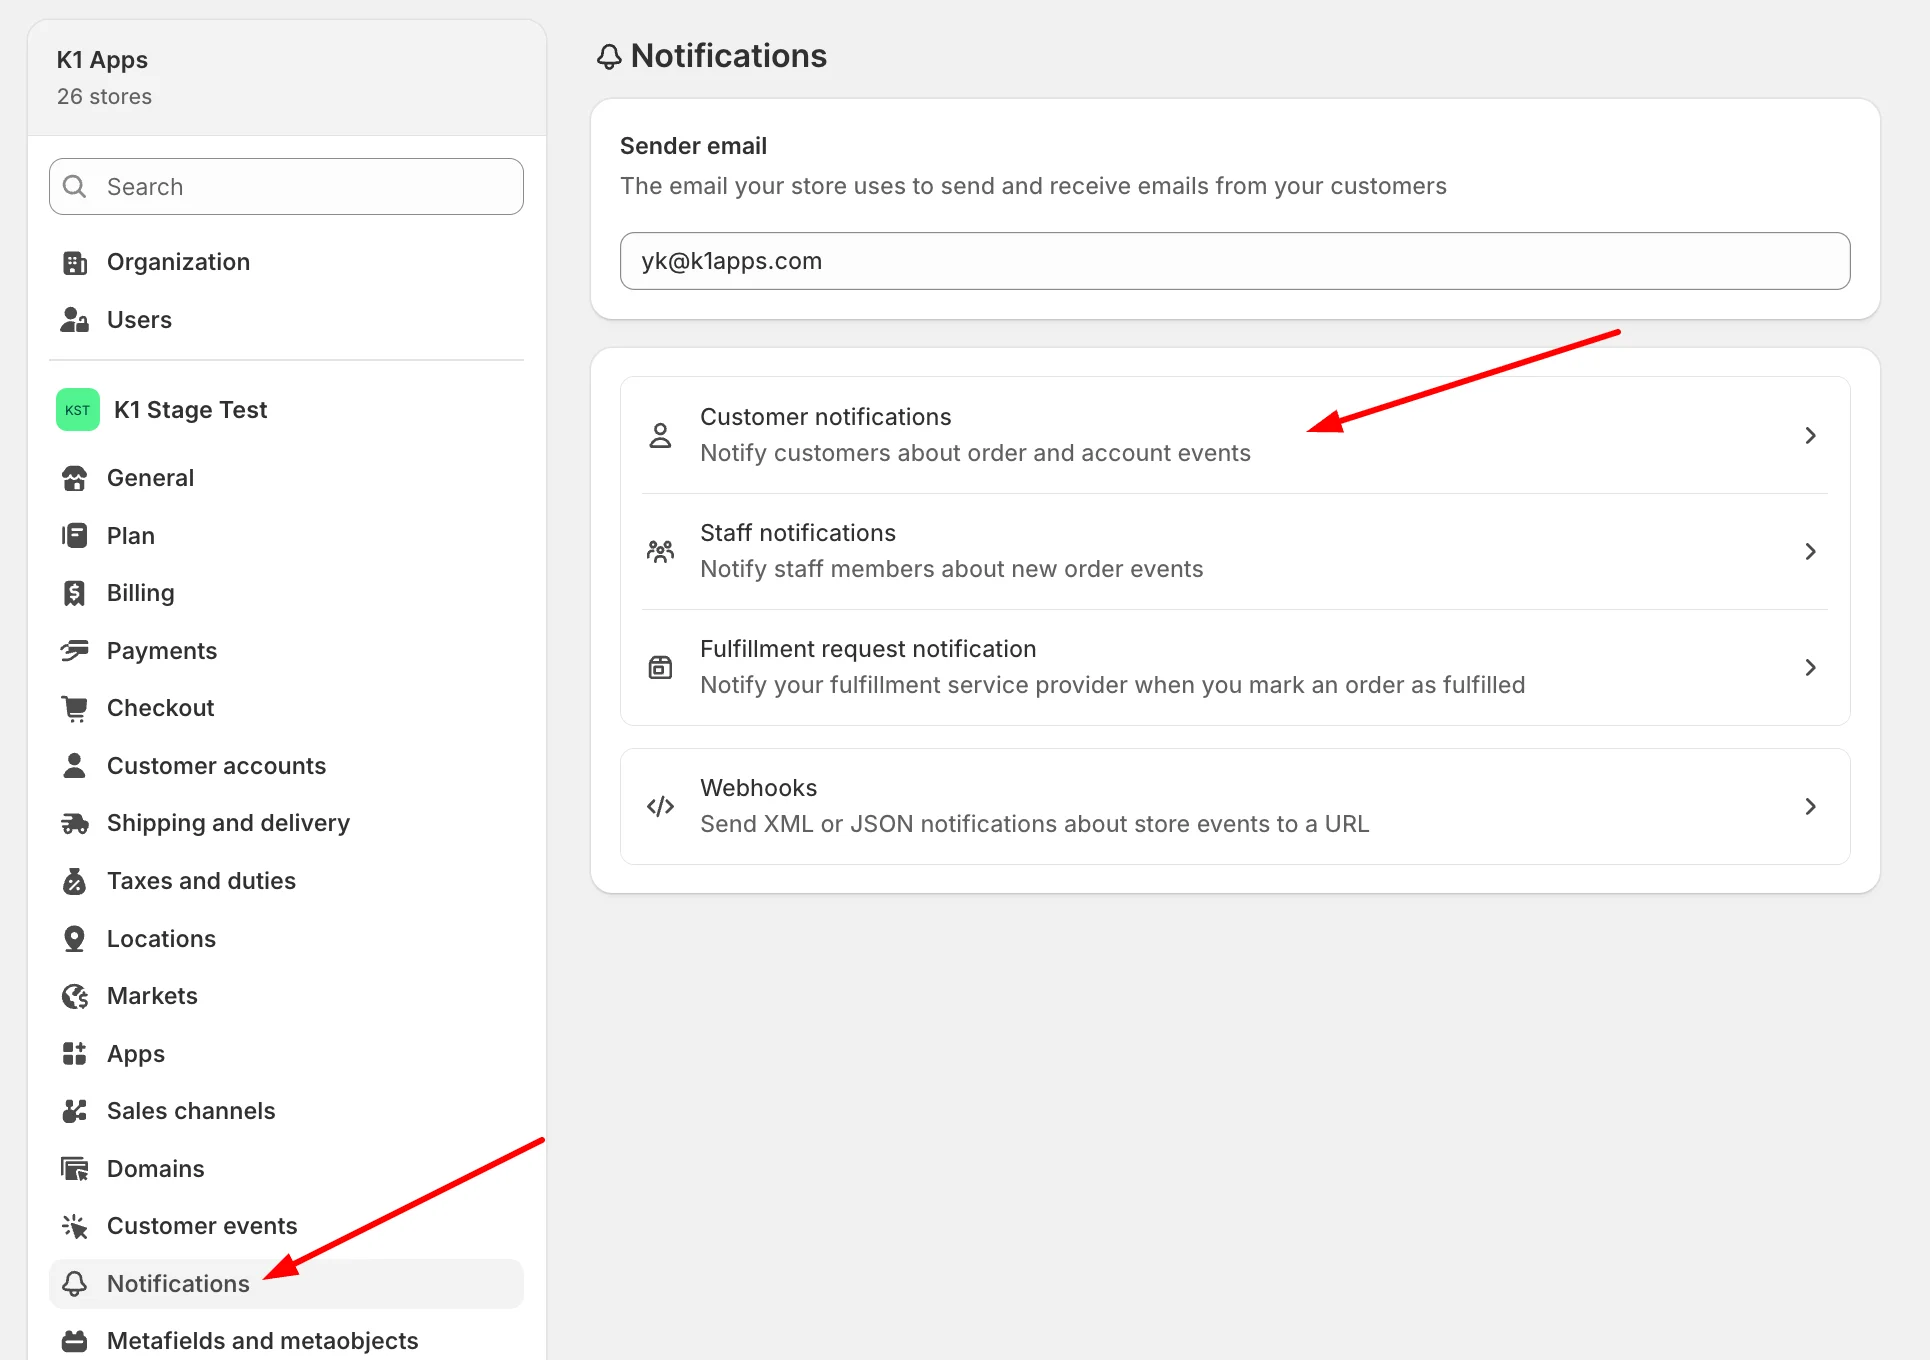
- In Shopify admin, go to Settings → Notifications.
- Open Customer notifications.
- Click on Order confirmation (or Order invoice).
- Click Edit code.
Step 2. Find the Due Date Block
Inside the template editor, click into the code area and press Cmd + F (Mac) or Ctrl + F (Windows) to open the search bar. Look for one of these blocks:
For deposits with a specific due date:
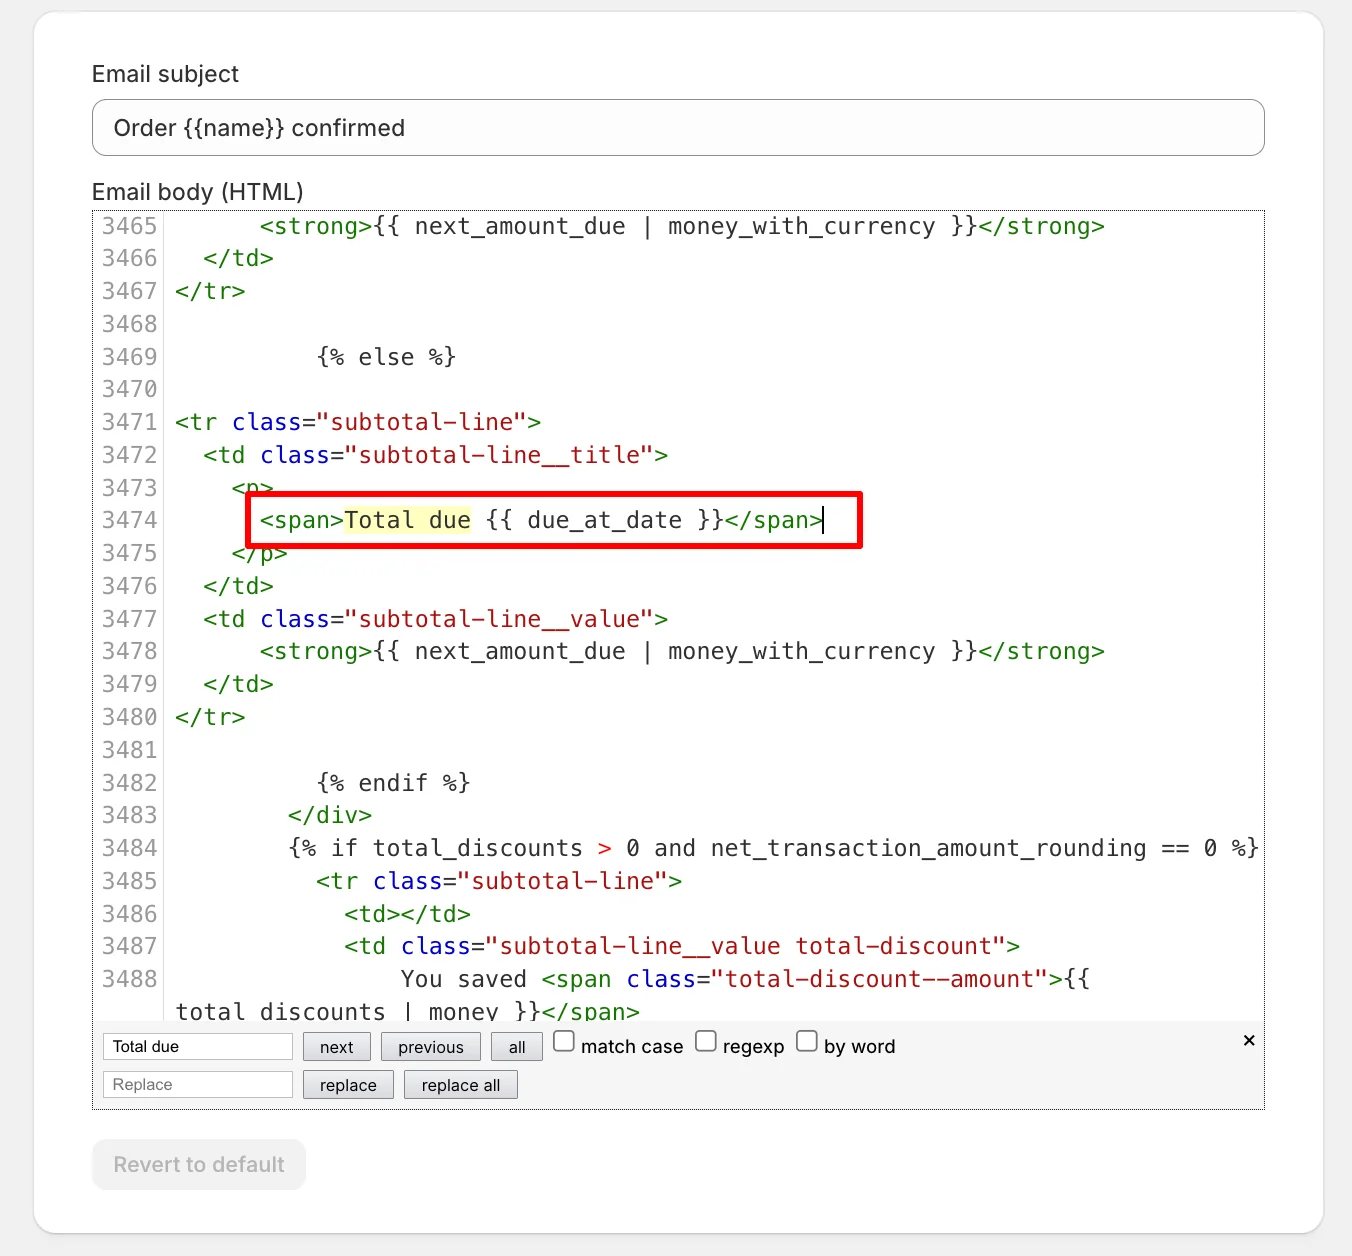
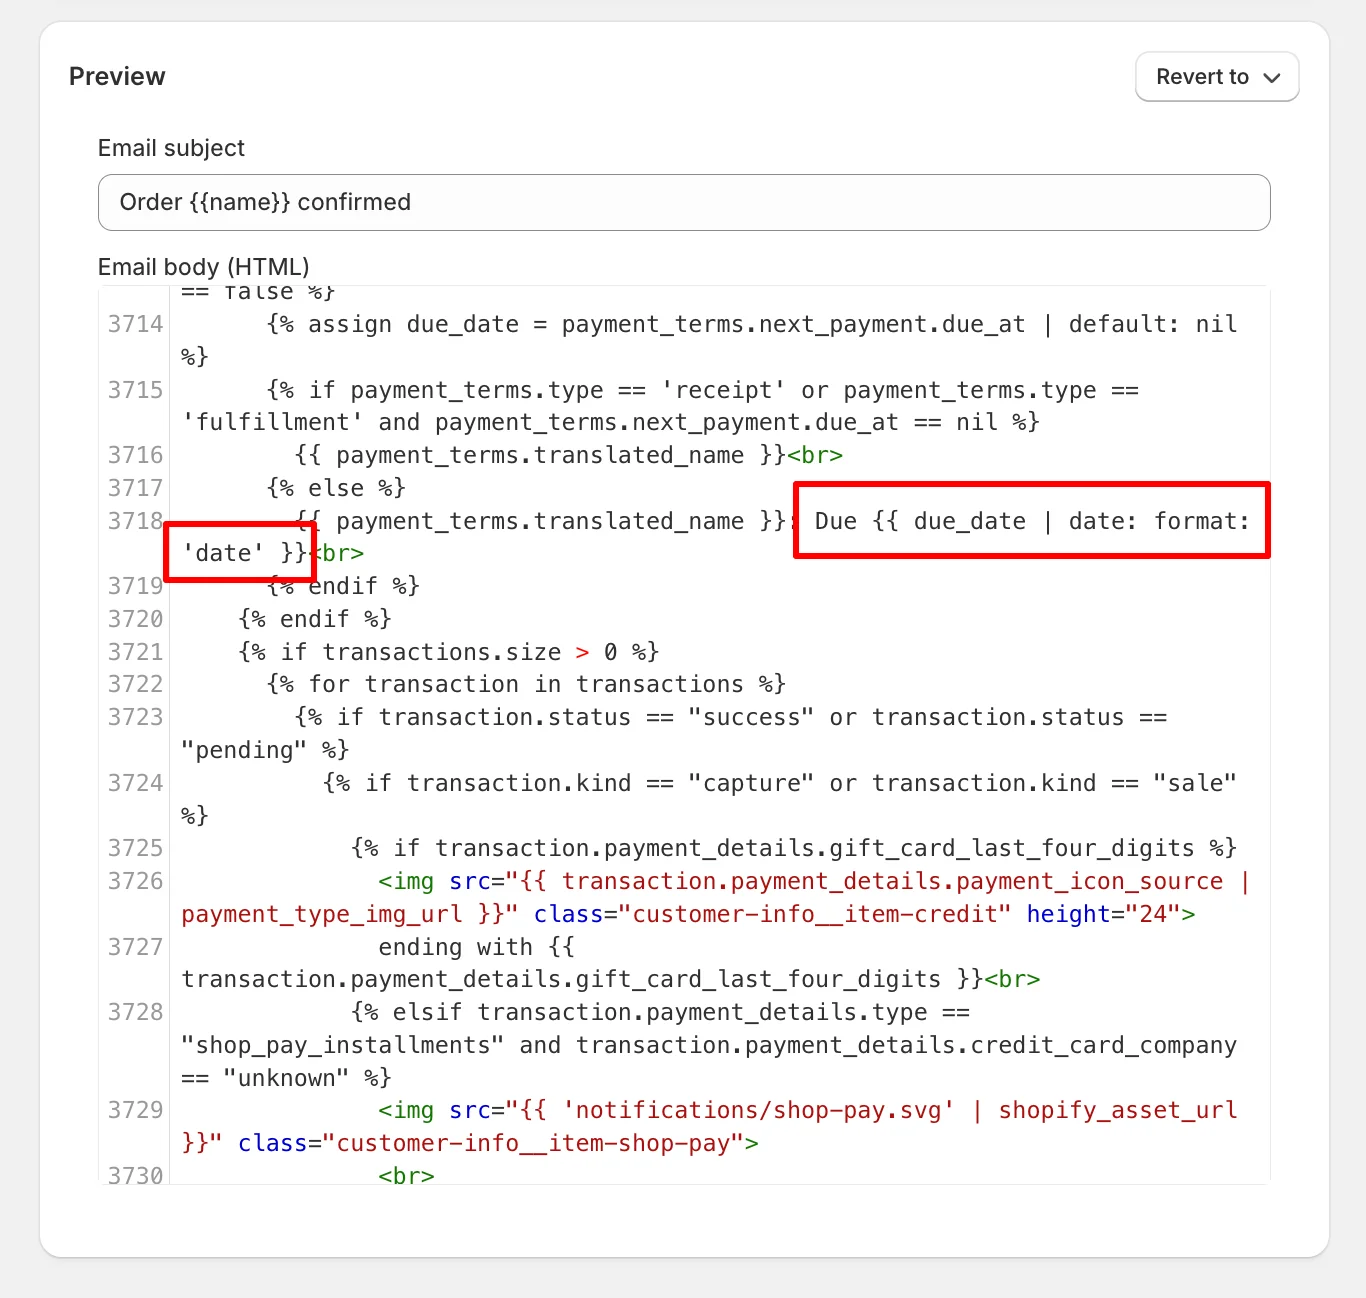
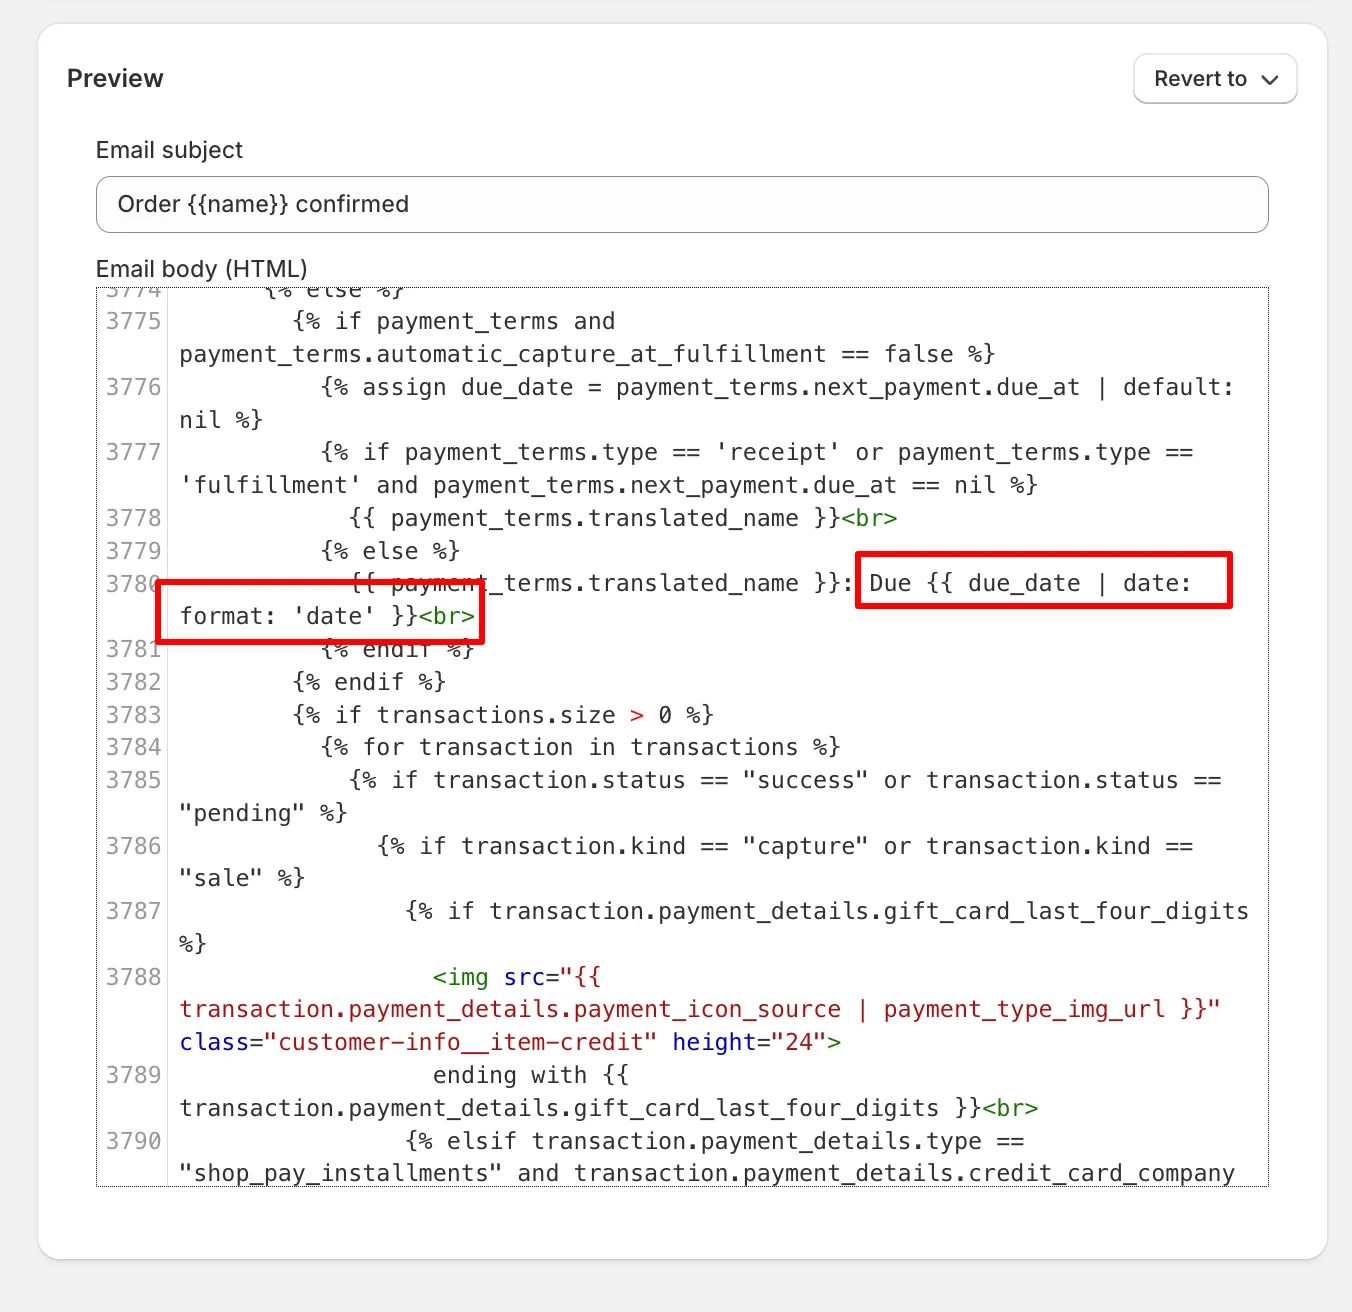
Step 3. Edit or Remove the Text
You can:
- Edit the wording inside the
<span>or paragraph (for example, change Total due to Balance due at shipping). - Remove the line completely if you do not want the date in the email.
Click Save when you are done.
Step 4. Send a Test Email
- Place a real test order containing a pre-order product (or re-send an existing pre-order email from the order timeline).
- Open the email and confirm the text shows exactly as expected on both desktop and mobile.
Editing Text for Other Languages
If your store sells in more than one language, you can customize all of the due date and deposit text for each language too — the process is exactly the same as described above, you just switch to the language you want to edit first.
Step 1. Open Localize
- Open Theme content as described in the Open Theme Content section above (Online Store → Themes → ⋯ → Edit default theme content).
- In the top-right corner, click Localize and select the language you want to edit.
Step 2. Edit the Text
- Use the same search keywords and field names from Part 1 and Part 2 above to locate each due date / deposit string.
- Enter your translated wording for the selected language.
- Click Save in the top-right corner.
- Repeat for every language you want to customize.
Notes and Limitations
- These strings and templates are managed by Shopify, not by K1 PreOrder. If you switch themes, reset theme content, or revert an email template, your custom text may need to be re-applied.
- Changes to theme content apply only to the currently published theme. If you edit a draft or duplicated theme, publish it first.
- The due-date text appears only on orders that include items flagged as deferred (which includes K1 pre-orders with deposits or delayed fulfillment).
- If a field has a duplicate “… next” version, always fill in both with the same text so the change works during Shopify's gradual rollouts.
- For multilingual stores, customize the text for each language separately using the Localize button in Theme content — see the Editing Text for Other Languages section above.